Showing posts with label adults. Show all posts

Tuesday, February 11, 2014

Savory Cheese and Seed Cookies


Aren't savory cookies just crackers? Well, no, not really. These little guys still  have the texture and appearance of cookies so I think the name is pretty spot on. These cookies are an adaptation of a recipe from Healthy Lunchboxes for Kids. These are a great snack for everyone in our house. I like to eat a couple with a serving of fruit.

Ingredients

- 1 cup grated cheddar
- Scant 1/2 cup butter, softened
- 1 cup whole wheat pastry flour (this flour ground from soft white wheat, rather than hard wheat) or substitute all-purpose flour
- 1 tsp baking powder
- 2 tbsp hulled pumpkin seeds
- 1 tsp baking powder
- 1 cup crispy brown rice breakfast cereal (use white rice cereal if that's what you have)

Directions

1. Preheat oven to 350 degrees F.
2. Line a baking sheet with parchment or a silicone baking mat.
3. Put cheese and butter in a medium mixing bowl and cream together. Add in the flour, baking powder and seeds.
4. Put rice cereal in a plastic zippered bag and break up with a rolling pin. (This is an awesome kid job!) Add to flour mixture and mix everything together, using your hands.
5. Squeeze into small balls the size of cherry tomatoes, roll between your palms, then flatten between your hands. Place on baking sheet and flatten a little more with a fork.
6. Bake 10-14 minutes until golden. Cool on a wire rack. Once fully cool store in an airtight container or freeze.

Makes about 18 cookies

Tuesday, February 28, 2012

DIY Instant Oatmeal Packets

With both my husband and I rushing to get to work in the morning, the dog to take out and Luc to get ready and off to daycare, mornings can be a little crazy for us just as they can be for most families. While I try to have healthy breakfasts planned and made in advance that doesn't always happen, especially towards the end of the week. These DIY Instant Oatmeal Packets have helped to keep us fed and sane on weekday mornings over the past few weeks. These were inspired by a post on Once A Month Mom but I've made a couple changes to make them a little healthier. Not only are these much less expensive per serving than the pre-packaged commercial varieties but you get to control the sugar content.


The skim milk powder and the sucanat may seem expensive when you buy them, but you can make 200 oatmeal servings using this small bag of milk, and about 145 servings of oatmeal from this bag of sucanat! And of course oats are super inexpensive, especially if you buy them from a bulk store (which clearly I did not do this time!) I also store mine in little reusable containers rather than using up plastic baggies . And while quick oats are not quite as healthy of steel cut oats, they are still considered whole grain (nothing is removed, they're just cut up smaller), so you don't have to feel quilty for succumbing to convenience.


This recipe is for the equivalent of one of those little comercial packets which I find is a good toddler serving size. However, I also make double sized portions as adult-sized servings. You can whip up, assembly line style, a dozen of these in about 3 minutes! You could use brown sugar rather than the succanat but not only is the succanat less refined and healthier, but it really tastes better. This recipe is for a really basic oatmeal but you can experiment with different spices as well as adding dried fruit.

DIY Instant Oatmeal Packet (1 serving)

- 1/4 cup quick oats
- 1 tsp instant milk powder
- 1/2 tbsp succanat
- pinch sea salt
- pinch cinnamon

Mix all into a small resealable container and store in the cupboard for use on those crazy mornings! To use add contents to a small bowl, add 1/2 cup of boiling water, stir and let sit for 2 minutes. Enjoy.

If you have a little more time on your hands here are a couple of my favourite Oatmeal recipes: Chocolate Raspberry Oatmeal and Birchermuesli!

Wednesday, February 1, 2012

Turkey Harvarti Pinwheels with Basil Mayo

I'm back at work this week after being off to help out my incompacitated husband after surgery. He still has an arm in a sling so it's up to me to do most of the chores, looking after Luc, etc. What that means is that I'm really relying on fast and fuss-free food, just like these pinwheels.

Pinwheels make a great part of a lunch. They are super quick and easy to make, more fun presentation-wise than a sandwich, and easier for little hands to manage. Also, now that there are so many more choices of nitrate-free natural deli meat so there are more options for fillings, including this one, which is a favorite around our house. You can substitues chicken for the turkey of course and another kind of cheese if you'd like as well (shaved baby parm sprinkled over top of the meat tastes awesome -- Luc perfers its more mild taste than Parmigiano Reggiano). This below recipe is just for one, but I usually make some for all of us, assembly line-style.


Turkey Havarti Pinwheels with Basil Mayo

- 1 6" whole grain tortilla
- 2 slices nitrate-free turkey deli meat
- 2 slices havarti (or cheese of your choice)
- 1 6" stalk celery, quartered lenthwise to get a skinny stick
- 2 tsp plain cream cheese
- 1 tbsp mayonnaise
- 2 tsp minced fresh basil

In a small bowl or ramekin, mix mayonnaise with fresh basil and set aside.

Lay out your tortilla, and smear the cream cheese over the last inch of the edge on half of the tortilla (the cream cheese will be your glue to hold the whole thing together). Spread the remainder with an even layer of basil mayonnaise. Lay the turkey slices on top, then layer the cheese. Place the celery stick at the lower edge and roll up as tightly as you can, pressing lightly to seal the edge. With a very sharp knife, slice the roll into even slices. Pop the two ugly end pieces in your month to pretend they were never there.


Wednesday, January 25, 2012

Staple Recipe: Slow-cooker Applesauce

I'm writing this post in a hospital waiting room. My husband is finally getting the shoulder surgery he's been wanting to have for several years. His shoulder dislocates fairly regularly and it prevents him from doing many of the activities that he enjoys -- even picking up Luc certain ways. So it's a good hospital visit today, but that doesn't make it any less long!

Applesauce is a baby and toddler staple. From the age of 6 months, you'll be going through a lot of this stuff! The slow cooker makes preparing a big batch of applesauce so easy and convenient. You can then freeze it in whatever quantity works for you. You could use baby cubes for infant-sized portions and one-cup container for toddler, child, and adult portions.

Not only is it a great healthy snack on its own but it makes a great mixer for baby food purees, especially mixed with meats and vegetables that baby may find less appealing on their own. I will be posting a great puree recipe in the coming weeks that features this pre-made applesauce but really so many things taste great with the addition of a bit of sweet apple. It also great to have on hand in the freezer to bake with or to use as a dip for waffle strips.                                                


Slow-cooker Applesauce


- 3lbs  Macintosh apples
- 1 tsp apple cider vinegar
-  2 quarts (8 cups) water
- 1/2 cup water, apple juice, or cider

In a very large bowl mix the 2 quarts of water with the apple cider vinegar.

Peel, core and quarter the apples, placing them in the bowl of water as you go, making sure they get submerged (this step prevents browning).

Once you are done cutting the apples, drain them well and add them to a slow-cooker (at least 4-quart capacity) and add the 1/2 cup water, juice or cider.

Cook on high for 3 hours. At the end of that time giving the apples a good stir will make them dissolve into applesauce.

* This recipe is for unsweetened applesauce. If you'd like to sweeten it for kids over one year or yourself, replacing 1/4 cup of the water for 1/4 cup pure maple syrup (a darker grade is best) results in a seriously delicious applesauce free of refined sugar.

* Makes approximately 3 cups.


Tuesday, January 10, 2012

Indian-Inspired Chicken Soup

This soup is just a little more work that most of the recipes that I post here, but as long as you have an immersion blender (and you should, they're awesome! I have this one and I love it) then it's really not a big deal.

This recipe came about by taking my favorite parts of several real Indian soup recipes and combining them. The result is that this "franken-soup" is no longer very authentic (hence, 'Indian-Inspired) but it's really very tasty and wonderfully warming for fall and winter.

Keeping the chicken in quite large chunks to start makes it easier to remove the chicken when it's time to puree the soup. Then you can quickly chop the cooked chicken and add it back into the soup as more manageably sized pieces. This recipe is suitable for munchkins over 10 months.


Indian-Inspired Chicken Soup

- 1 cup uncooked chicken breast,  large dice
- 1/4 cup onion, chopped
- 1/4 cup celery, finely chopped
- 1/4 cup carrot, finely chopped
- 2 tart apples (or if sweet, omit sugar), pared and chunked
- 1/4 cup butter or ghee
- 1/4 cup all-purpose flour
- 1 tsp curry powder (preferably Madras)
- 6 cups low sodium or homemade chicken broth
- 1 tomato, peeled and chopped
- 1/2 med green pepper, finely chopped
- 1 tbsp flat leaf parsley, minced
- 1 tsp salt
- 1 tsp granulated sugar
- 1/8 tsp ground black pepper
- 1/8 tsp ground mace (or substitute a pinch of ground nutmeg)
- 2 whole cloves
- 1 cup cooked Basmati rice

Cook chicken, onion, celery, carrots, and apple in melted butter un a large saucepan over medium heat until softened and fragrant.

Stir in flour and curry powder and cook 1 minute. Gradually add chicken broth, stirring constantly. Stir in all remaining ingredients. Cook, covered, over low heat until chicken is tender, roughly 20 minutes.

Remove and reserve chicken with a slotted spoon. Fish out and discard the cloves.

Using an immersion blender, puree the soup until it is smooth (Alternatively you can work in batches in your blender or food processor). Give the chicken a rough chop to make the pieces bite-sized. Stir in cooked rice.

Enjoy!

* Serves 4-6


Wednesday, August 3, 2011

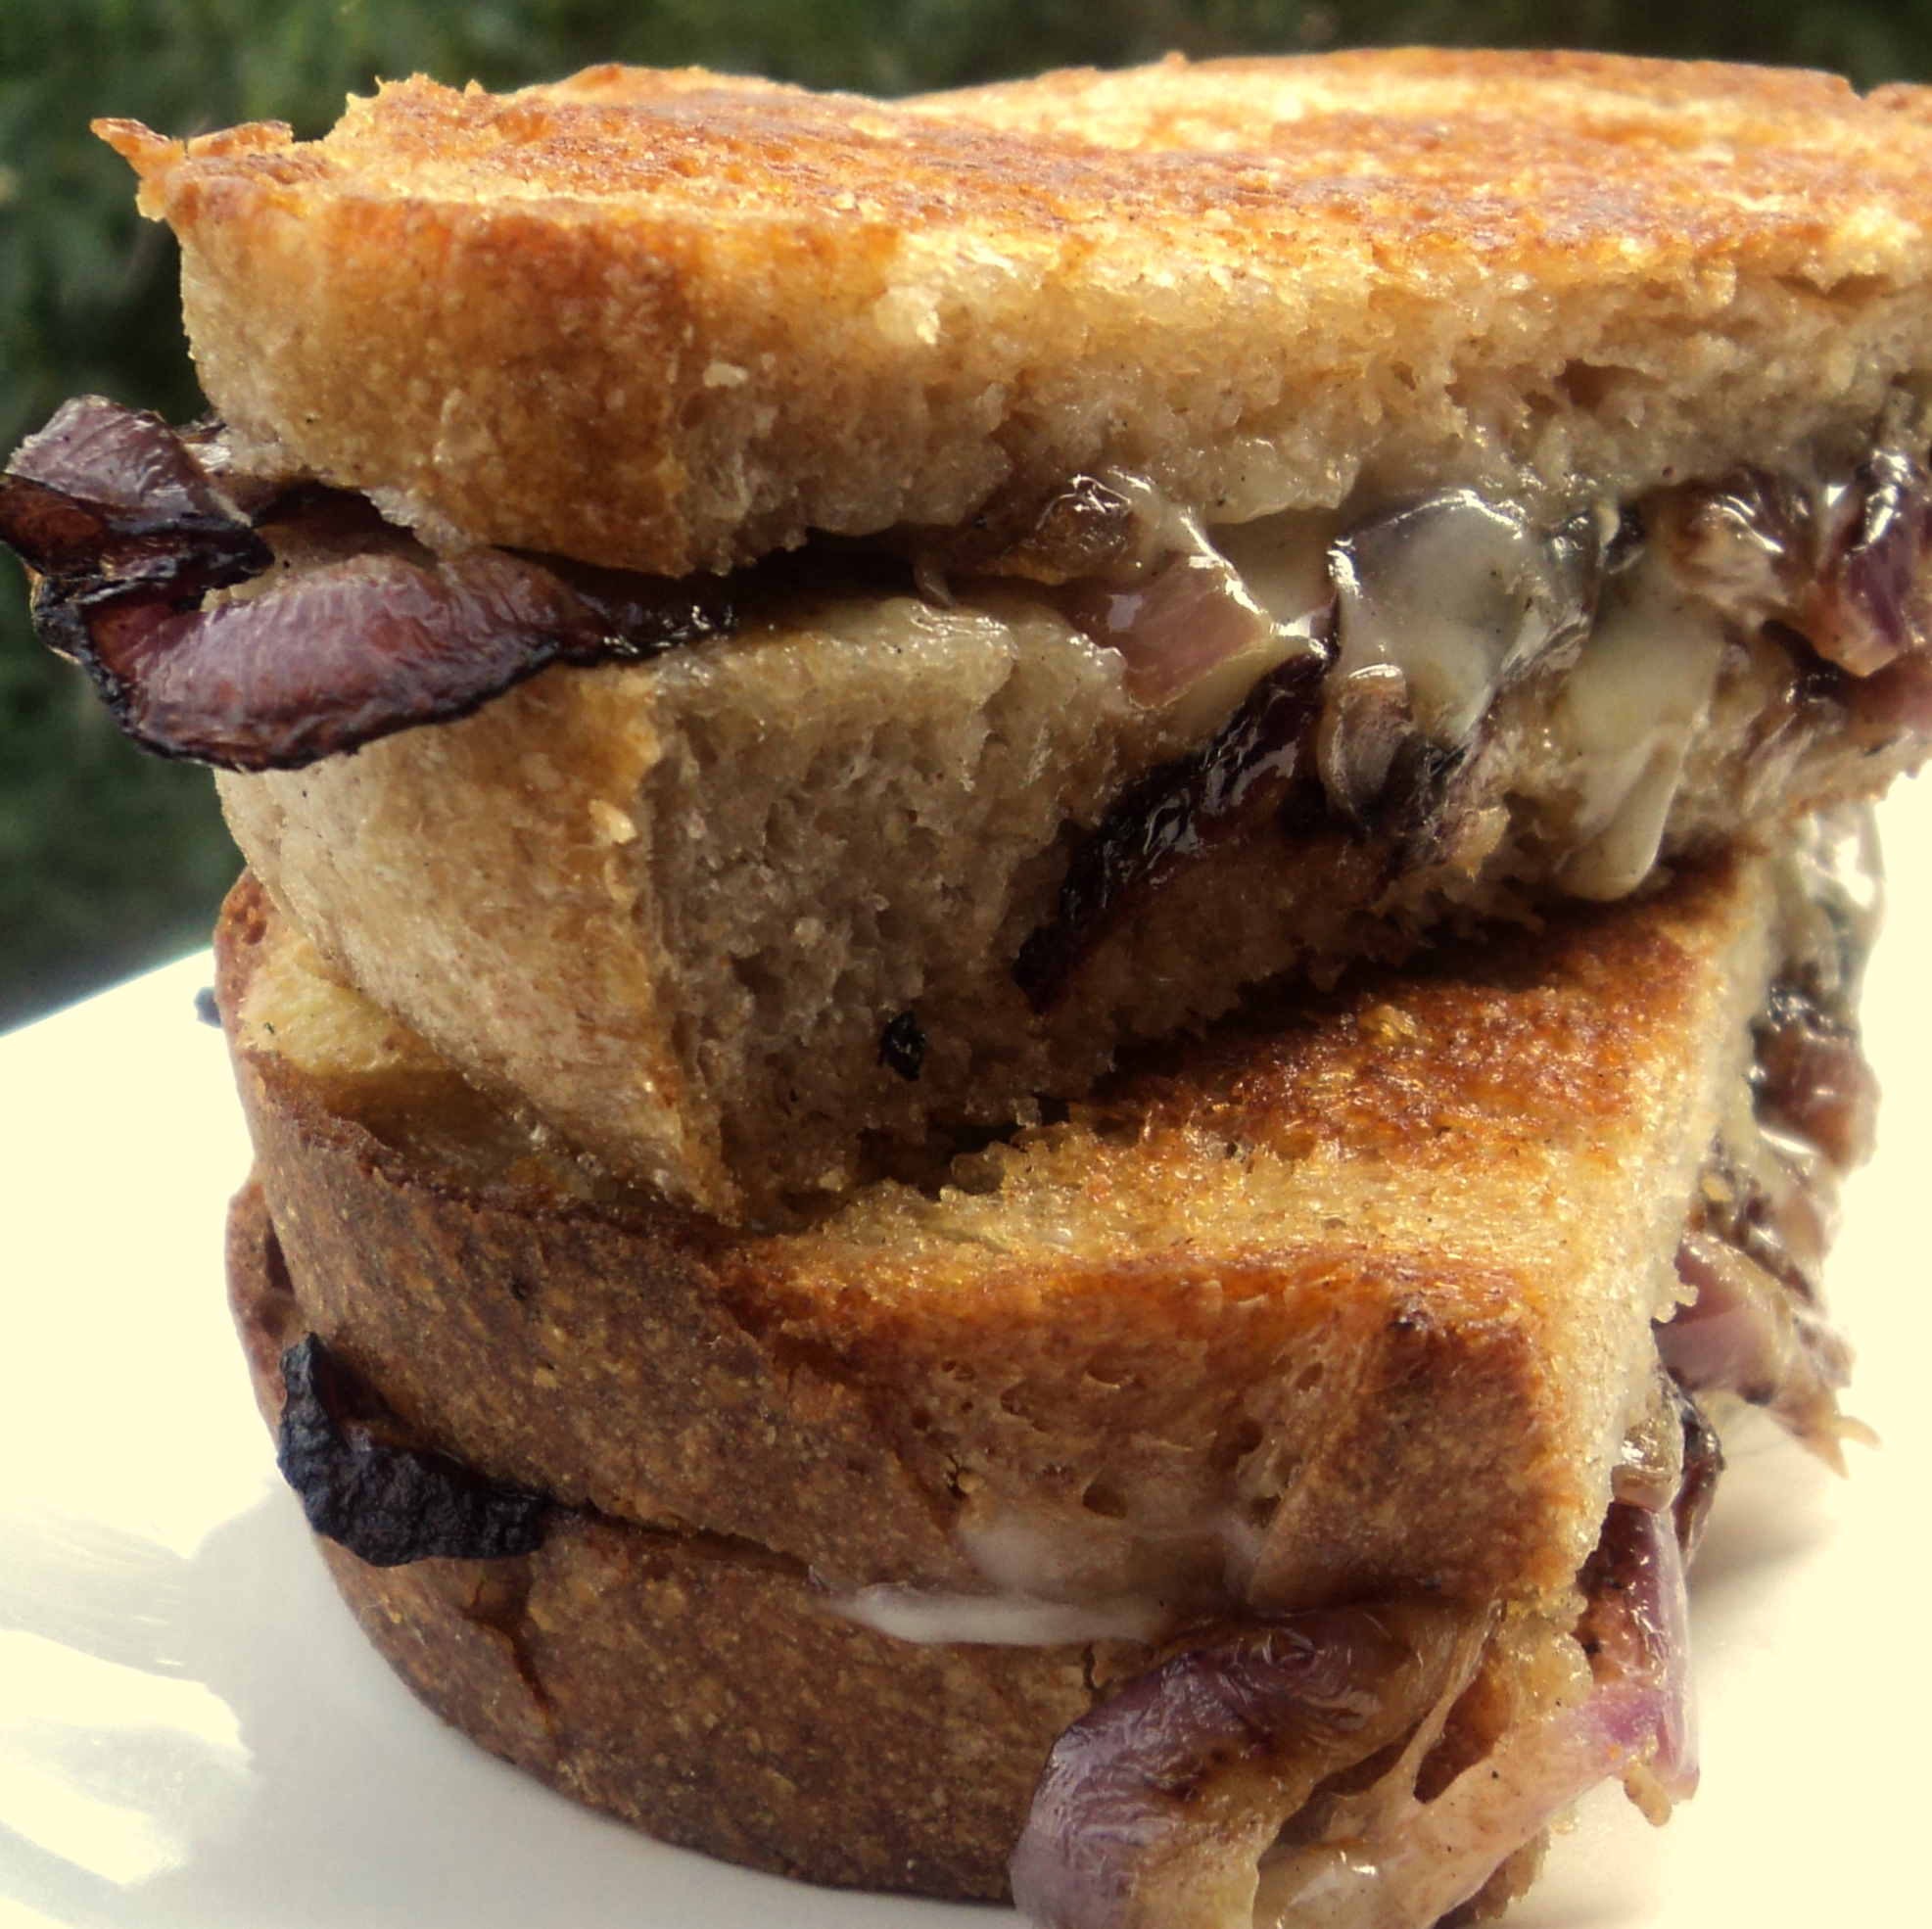
Recipe Shout-Out: Amazing Grilled Cheese

This Grilled Cheese with White Cheddar, Carmelized Onions and Sage recipe from Gaby over at Broke-ass Gourmet is super easy and insanely delicious.  Luc and I both inhaled them. It's just not the same without  white sourdough bread so don't be tempted to sub in something healthier -- sometimes it's just not worth the compromise. Next time you have a craving for some goey cheesy goodness make this super flavorful sandwich, you will not be dissapointed!


Monday, June 27, 2011

Strawberries in Ginger Cream

I work Saturdays, a fact that would be a major downer except that where I work just happens to also be the site of one of the best farmer's markets in the city that day. 


Last Saturday, I didn't mean to buy anything, we had our CSA box coming and we didn't really need anything, but I just couldn't help myself when I was walking through and caught the strongest whiff of strawberries imaginable that stopped me dead in my tracks. Most supermarket frankenberries shipped from California look beautiful but have almost no smell, even with your nose pressed right up on them. These fresh local strawberries by contrast smelled of sweet fields still kissed by the sun. They were irresistible and I bought two pints.

After eating them straight up, this recipe is my second favorite way to enjoy strawberries. Due to the strawberries and honey, this tasty little number is suitable for babies over age 1. 


Strawberries in Ginger Cream

- 1 cup sliced strawberries
- 2/3 cup plain yogurt
- 1 tbsp good quality honey
- 1-2 tbsp very finely chopped crystallized ginger


Mix all of the above ingredients in a medium bowl. Divide into individual serving bowls and enjoy!


Serves 4.

Monday, June 6, 2011

Whole Grain Honey Sesame Cookies

I've been feeling stressed because our dog sustained a head injury and cost us a fortune in vet bills and when I'm stressed, cooking and baking help me to relax. I find it relaxing to not have to think too about anything for a little while besides what I'm doing with my hands and getting into a rhythm of washing, chopping, rolling, stirring... Plus, there's always a little thrill of accomplishment when things work out well.  

These cookies are one of things that I made recently and they were a big hit with my son. These uber-healthy cookies are adapted from the granola muncher's classic, Diet for a Small Planet. Full of whole grains, healthy fat, calcium, and fibre these are cookies that you don't have to feel guilty about eating or feeding them to your little ones. 


Whole Grain Honey Sesame Cookies

- 1/2 cup honey 
- 1/2 cup coconut oil, melted
- 1 egg, beaten
- 1/4 cup milk (cow, almond, coconut -- your choice)
- 1 1/4 cup oats, ground to a flour
- 1 cup whole wheat flour
- 1 tsp ground cinnamon
- 1/4 tsp sea salt
- 3/4 cup sesame seeds, toasted
- 1/2 cup dried currants (or chopped raisins)


Preheat oven to 325 degrees Fahrenheit. In a dry skillet, toast sesame seeds over med-low heat stirring regularly until lightly toasted and nutty smelling. Meanwhile, grind the oats into a flour using either a coffee grinder or a food processor. 

In a large bowl, blend together the honey, coconut oil, and egg. Stir in the remaining ingredients. Dough should be quite stiff.


Drop batter in approximately 1 tbsp size amounts onto a greased baking sheet. Flatten each gob of batter with moist fingers and bake in your preheated oven for 12 minutes, flipping halfway through. Let cool on a wire rack before storing in an airtight container. 


*TIP: measure the oil first and add to bowl and then use the same measuring cup to measure the honey -- it will slide right out into the bowl.


* Will keep for up to 4 days in an airtight container or freeze for one month.

Friday, May 20, 2011

North African Snack Bites

I'm always trying to find new snack ideas and recipes to keep snack-time interesting. I adapted this recipe from on on Food.com. Not only is this snack full of energy, ultra easy and involves no cooking, but it's also a fun recipe to get young kids helping you out in the kitchen. They can press the 'on' button to make the food processor whiz and then help roll the mixture into balls and swirl them in the toppings. These snack bites are suitable for everyone in your family over the age of 1 and I would be shocked if they didn't disappear quickly into even the pickiest munchkin!


North African Snack Bites

- 1/2 cup peanut butter (or sunflower butter)
- 1/2 cup honey
- 1 cup wheat germ, toasted
- 1/2 cup powdered milk (I used whole milk, but skim would be fine) 
- 1/4 cup unsweetened shredded coconut
- 1/4 cup sesame seeds, toasted


In a dry skillet, toast the wheat germ over med-low heat until golden and fragrant, stirring frequently. Remove once done to the bowl of a food processor, then add the sesame seeds to the skillet and toast similarly. When toasted, remove to a plate. 


Add peanut (or sunflower butter) to food processor bowl, along with the honey and powdered milk. Whiz until well combined. 


Place the shredded coconut on another plate. 


Form the peanut mixture into balls and roll in the topping, either both or separately, your call.


Transfer to an airtight container lined in waxed paper and chill in the fridge. They will keep for up to 4 days. 


Saturday, May 14, 2011

Recipe Shout Out: Baked Vegetable Samosas

These Baked Vegetable Samosas from Simply Life use ready-made wonton wrappers so they are so quick to make and the fragrance of the filling makes it difficult to wait until you stuff the wrappers before digging in! I followed the recipe exactly except to cut out the chili in order to make them toddler friendly. I have also had great success with freezing these. Just freeze uncooked samosas in a single layer on a baking sheet, then transfer to a large freezer bag. There's no need to defrost before baking, just add approximately 2 minutes to the baking time. Hope you enjoy these as much as we did! Follow this link over at Simply Life for this tasty samosa recipe.

Wednesday, May 11, 2011

Herbed Mushroom Sandwich Spread

Happy belated Mother's Day! We went away to visit my parents and spent much of Monday afternoon sitting in a rural hospital waiting room since Luc had a terrible ear infection -- other than that it was a good weekend out of the city!  This is the second ear infection in two months so I really hope that he isn't one of those kids that constantly have them...fingers crossed.

Onto more delicious topics, this spread is really yummy. It tastes like concentrated homemade Cream of Mushroom soup. However good it tastes, I could not make this recipe look anything other than gross in a picture and so this is a picture of Luc's lunch that featured this spread. He gets a kick out of eating shapes he knows so anything shaped like a star, heart, ball, or circle goes down well these days. Also delicious served with crackers or crispbreads, both for munchkins and adults. Suitable for babies from 8 months, just cut bread spread with this mixture into a tiny dice once baby shows interest in finger foods.


Herbed Mushroom Sandwich Spread

- 1 1/2 cups sliced white button mushrooms
- 2 shallots, diced
- 1 tbsp butter
- 3 tbsp fresh flat-leaf parsley, chopped
- 1/4 cup softened cream cheese

In a large skillet, melt the butter over med-low heat. When bubbling slightly, add the mushrooms and diced shallots and cook, stirring occassionally, until both are softened, about 8 minutes. Stir in chopped parsley.

Let mushroom mixture cool while the cream cheese is softening.


Whiz mushroom mixture with cream cheese in a food processor until fully combined and creamy.

*will keep in the fridge for 1 week


Monday, May 2, 2011

Turkey and Mango Quesadillas

I had some frozen leftover turkey from Easter, but you could of course always use leftover cooked chicken to make these quick and fresh tasting quesadillas.I didn't include amounts for the filling because really, you can just eyeball it - just be careful not to overfill or it will come tumbling out as you try to eat. This quesadilla was completely gobbled when I put half of it in Luc's packed lunch. 

While there is nothing in this sandwich that makes it inappropriate younger babies, it's really best for older infants and toddlers fully able to eat finger foods.  You can either cut it into little squares for younger ones or cut into 4's as below for older toddlers, kids and adults.


Turkey and Mango Quesadillas

- cooked shredded turkey meat (or chicken)
- diced ripe mango
- Monterrey Jack cheese
- black pepper, to taste
- minced cilantro
- 6 inch whole wheat tortilla


Assemble the quesadilla. Only put toppings on one half of the tortilla and then fold it over. I like to put some cheese both first and last to make sure the whole thing melds together as it melts. 

In a frying pan on med-low heat, melt a tiny pat of butter (or you can spray the the pan with cooking spray,  but it doesn't taste as good). Press the quesadilla down occasionally as it cooks to flatten to make it easier for little mouths to eat. Cook until golden, melty, and yummy. Allow to cool somewhat before cutting to keep the goodness from escaping. 


* makes 1 adult serving or 2 toddler servings

Tuesday, April 12, 2011

Whole Wheat Soft Italian Bread Sticks

This is a bread stick recipe that I adapted from one that I found at Food.com (recipe #104628) to make significantly healthier. These are now more nutritious, quicker to make and still flavorful. As I posted before, I LOVE my bread machine, which incidentally I got for free by redeeming Air Miles! These bread sticks are great for the whole family to round out a supper or as a snack by themselves or with a dipping sauce. We've dipped these both in Luc's Favorite Tomato Sauce as well as Catherine from Weelicious' Ranch Dip with yummy results.These homemade bread sticks are appropriate for children over 8 months.


Whole Wheat Soft Italian Bread Sticks

- 1 1/3 cup water, lukewarm
- 3 tbsp olive oil
- 3 cups whole wheat flour
- 1/2 tbsp gluten*
- 1 tsp Italian seasoning
- 1 tsp garlic powder
- 2 tbsp raw cane sugar (or white sugar)
- 1 1/2 tsp sea salt
- 2 tbsp Parmesan or grana padano, grated
- 2 1/4 tsp instant yeast
 
Add ingredients to the bread pan of your bread machine in the order listed, making a well in the dry ingredients before adding the yeast. 

Select the 'dough' setting.

When the cycle is complete, remove the dough to a lightly floured surface and divide in half. Divide each half into 12 equal pieces. Roll each piece into a 5-6" rope.

Place 2" apart on greased cookie sheets, cover, and let rise in a warm place for 20 minutes until doubled (for this part, I preheat my oven at 200 degrees Fahrenheit for 5 minutes to warm in and let them rise in there). 

Bake at 350 degrees Fahrenheit for 12 minutes, turning halfway through, until golden brown. 


* Makes 24 bread sticks
* Gluten (aka vital wheat gluten) helps the dough to rise. Can be purchased at health food stores, well-stocked grocery stores, and some bulk stores. 
* Freezes well.You can either freeze after baking, or you can freeze the dough after you remove it from the bread machine and upon thawing, just continue with the recipe. I usually freeze half the dough ball to bake later.

Monday, February 28, 2011

Mandarin Vanilla Super Shake

Luc is still sick although seemingly on the mend and hasn't vomited for about 48 hours and his fever has broken. However, understandably he has no appetite and the only thing he would eat was a couple crackers in the last few days. He is uninterested in the usual bland sick foods and all he keeps asking for is milk and fruit. 

I didn't want to give him dairy while his tummy was still very sensitive, so I made this shake which is dairy-free but still creamy and a little fruity.  It was also delicious! Luc actually wanted to drink it and it stayed in him. We will be making this tasty shake, which is full of protein, iron, whole grains, and vitamin c, whenever we have mandarins on hand!


Mandarin Vanilla Super Shake

- 1 mandarin orange
- 1 half-pack (150 grams) soft tofu
- 1/2 cup ground rolled oats
- 1 tsp vanilla
- 1/2 tbsp ground flax seeds
- 1/4 cup water
- 1 tsp mandarin orange zest
- 1 tbsp agave nectar 


Grate the 1 tsp of zest off your mandarin orange, then peel and section. Combine all of the ingredients in a blender or food processor (I used a beaker and immersion blender) and blend until smooth and creamy. 

Friday, February 11, 2011

Blueberry Banana Mini-Muffins

These are the tastiest mini-muffins I've made so far that are healthy enough that I feel comfortable sharing with Luc. They make a great and portable snack (for moms and dads too) or can be part of breakfast, just add a side of fruit salad and some milk. These muffins are suitable for toddlers over age one. I adapted these from a recipe in the Baby and Toddler Cookbook.


Blueberry Banana Mini-Muffins

- 1 1/3 cups whole wheat flour
- 3/4 cup all purpose flour
- 2 1/4 tsp baking soda
- 1/2 tsp baking powder
- 1/4 tsp salt
- 1/2 tsp ground cinnamon
- 2 ripe bananas
- 2 lg eggs
- 2/3 cup brown sugar
- 6 tbsp butter
- 1 tsp pure vanilla extract
- 1 cup ripe blueberries (fresh or frozen, I use frozen this time of year)

Preheat oven to 375 degrees Fahrenheit. Stir together the flours, baking soda, baking powder, salt, and cinnamon in a large bowl.


In a separate medium-size bowl, mash the bananas with a fork until pureed. Add the eggs, sugar, butter, and vanilla. Blend together. Stir into flour mix until combined. 


Gently fold in the blueberries. Line your mini muffin pan with liners and spoon enough mixture to come flush to the top of your liners. Bake in preheated oven 20-25 minutes or until risen, golden brown, and a toothpick inserted into the center of one comes out clean. Let cool on a wire rack. 


Makes 36 mini-muffins


* Store in an airtight container for up to 3 days or freeze for up to one month.

Tuesday, February 8, 2011

Staple Recipe: Homemade Yogurt

Although I've always been meaning to try, for some reason I have always been a little intimidated by making homemade yogurt...I somehow think I'm going to poison us all! When I've looked into making it before, I've encountered so many different methods -- thermos, oven, slow cooker, yogurt maker, etc, etc that I had the impression that it would be time consuming to find what method would work well. 

Then I  read a recent post on making homemade yogurt over at Dinner with Julie and I finally decided to give it a try using her directions since her method needed nothing more than a pot, a jar and a towel for equipment coupled with minimal effort. 

It could not have been easier or turn out better....all on the first try! It was thick, creamy and just plain good and we've been enjoying it all week. I'm so excited about having added this new staple to my home cooking arsenal.


  If you've ever toyed with the idea of trying to make yogurt at home, or even if the thought hadn't crossed your mind until now...check out Julie's instructions here...you won't be disappointed!

UPDATE: I have found that to get thicker yogurt, just simmer for 10 minutes rather than the 2 minutes in the instructions.
 
Is there anything that you're a little intimidated to try to make yourself?

Monday, February 7, 2011

Chocolate Raspberry Oatmeal

Yum. Chocolate is a bit of an unusual add-in to oatmeal but it really is delicious and a nice change. This breakfast is suitable for babies over 1, due to the raspberries. Enjoy!


Chocolate Raspberry Oatmeal

- 2 cups milk
- 1 1/4 cup rolled oats
- 1 cup raspberries, fresh or frozen
- 2 tbsp cocoa
- 1/2 tsp vanilla extract
- 3 tbsp agave nectar (or sweetener of your choice)
- 1 tbsp butter

Mix all of the ingredients together in a saucepan.

Cook on low approximately 20 minutes until the oatmeal is thick and creamy. 

Serve plain or topped with milk, cream, or vanilla yogurt.


* Makes 4 adult sized servings
* Will keep in the refrigerator for 3 days

Friday, January 28, 2011

Carrot and Fruit Bread Fingers

I adapted this recipe from the Organic Baby & Toddler Cookbook that I reviewed here to make it both healthier and more successful. The result is a really tasty quick breakfast or snack that's perfect for toddlers over age one or to tuck in a lunch box for school-aged munchkins (or to snack on yourself). 


Carrot and Fruit Bread Fingers

- 1/4 cup butter, softened
- 1/3 cup honey
- 1 egg, beaten
- 3/4 cup carrots, grated
- 2 bananas, mashed
- 1 1/4 cup whole wheat flour
- 2 tsp baking powder
- 1/2 cup raisins, dried currants, or dried cranberries
- 1/4 tsp salt
- 1 tsp grated orange zest

Preheat oven to 350 degrees Fahrenheit. 

Cream the butter and honey together in a large mixing bowl. Beat in the egg. Mix in the carrots, bananas, flour, and baking powder. Add dried fruit and zest. 

Turn the mixture into an 8" square cake pan and level the surface with the back of your spoon. Bake until a toothpick comes out clean when you still it in the middle and the top is golden brown, bout 30 minutes. 

Let cool in the pan. Cut into bars and serve or keep for up to 4 days in an airtight container (not in the fridge). 

Makes 12 bars

Thursday, January 27, 2011

Cheesy Leftover Pasta Frittata

I accidentally cooked too much pasta for a dish a couple days ago and had some leftover that I didn't want to go to waste. This frittata was a simple and tasty way to use it up and while you could have it for breakfast or brunch, it also makes a great lunch with a salad on the side. The possibilities for variations with this one are virtually endless, making it a great way to clean out the fridge!


Cheesy Leftover Pasta Frittata

- 1/2 cup onion, chopped
- 1 tbsp olive oil
- 1 tbsp butter
- 6 eggs
- 1/4 cup milk
- 1/2 cup frozen peas
- 1/3 cup Parmesan cheese, grated
- 1 tbsp fresh basil, minced
- salt and pepper, to taste
- 1 cup cheddar cheese, grated
- 1 cup cooked pasta (any kind, but if long like spaghetti, cut into 1" pieces)

Preheat the broiler. In a heavy, oven-proof skillet, melt the butter and oil over medium heat. Add the onion and cook until it starts to soften, about 3 minutes. Meanwhile, in a large bowl, beat the eggs. Add the milk, basil, Parmesan, and season with salt and pepper. Stir the pasta and peas into the egg mixture.


Add the egg mixture to the skillet with the onion, gently pushing the pasta around until it is evenly distributed. Cook over medium-low heat until the egg is almost set. Remove from the heat and sprinkle the top evenly with the cheddar. 


Transfer the pan to the oven under the broiler, about 4-5" from the heat and cook for 5-8 minutes until the fritatta is set and is slightly golden brown.


Remove from oven, cut into wedges and serve. 


* this recipe is suitable for babies over age one, due to egg whites.
* this recipe is best eaten right away.


VARIATION: Substitute chopped green pepper for half of the onion, and Swiss for half of the cheddar.

Monday, January 24, 2011

Birchermuesli

Birchermuesli, which is a Swiss breakfast with raw oatmeal and fruit, has to be one of my favorites. I used to work beside a place that had it for takeout in the mornings, and I used to buy it several times a week. What a waste of money when it's so easy to make at home. This is a super healthy meal or snack--in fact it was originally devised by a Swiss Doctor as part of his recommended wellness regime. The possibilities for variations are endless. My favorite is basic like this but you can always add dried fruits, nuts, substitute pear for the apple or add spices like cinnamon and nutmeg. Enjoy! (Because of honey, this is suitable for anyone over age 1, you could make it using another sweetener, but it won't taste quite like Birchermuesli).


Birchermuesli

- 1 cup rolled oats
- 1 cup water
- 1 apple, skin on, grated or minced
- 2/3 cup blueberries, fresh or thawed frozen
- 1/2 cup plain yogurt
- 3 tbsp honey, or to taste

Mix the oats with the water and allow to sit for at least 12 hours in the refrigerator (please note that you can't skip this step). 

Just before serving, add apple, bluberries, yogurt, and honey. Mix well and serve. 


* makes 3 adult-sized servings


* can be refrigerated after mixing but it's best if it's eaten the same day (I sometimes will eat the leftovers as a before bed snack).
Related Posts Plugin for WordPress, Blogger...