I'm writing this post in a hospital waiting room. My husband is finally getting the shoulder surgery he's been wanting to have for several years. His shoulder dislocates fairly regularly and it prevents him from doing many of the activities that he enjoys -- even picking up Luc certain ways. So it's a good hospital visit today, but that doesn't make it any less long!
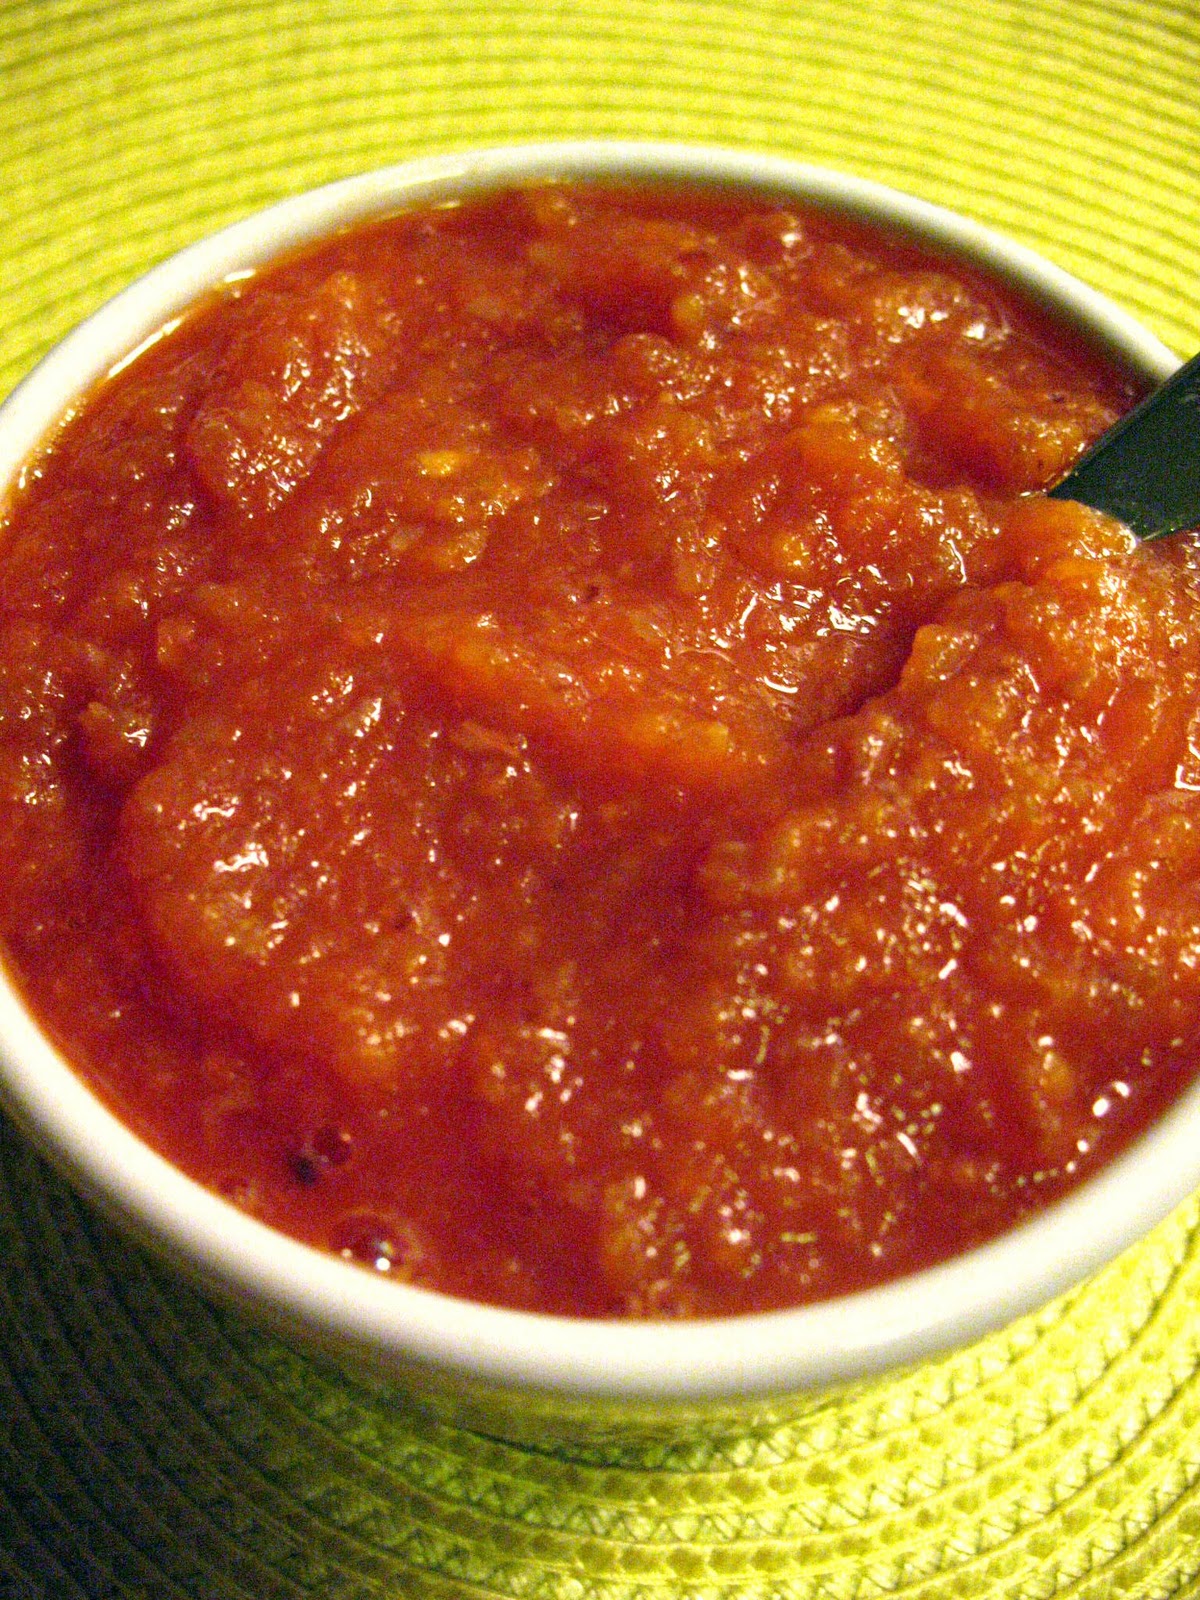
Applesauce is a baby and toddler staple. From the age of 6 months, you'll be going through a lot of this stuff! The slow cooker makes preparing a big batch of applesauce so easy and convenient. You can then freeze it in whatever quantity works for you. You could use baby cubes for infant-sized portions and one-cup container for toddler, child, and adult portions.
Not only is it a great healthy snack on its own but it makes a great mixer for baby food purees, especially mixed with meats and vegetables that baby may find less appealing on their own. I will be posting a great puree recipe in the coming weeks that features this pre-made applesauce but really so many things taste great with the addition of a bit of sweet apple. It also great to have on hand in the freezer to bake with or to use as a dip for waffle strips.
Slow-cooker Applesauce
- 3lbs Macintosh apples
- 1 tsp apple cider vinegar
- 2 quarts (8 cups) water
- 1/2 cup water, apple juice, or cider
In a very large bowl mix the 2 quarts of water with the apple cider vinegar.
Peel, core and quarter the apples, placing them in the bowl of water as you go, making sure they get submerged (this step prevents browning).
Once you are done cutting the apples, drain them well and add them to a slow-cooker (at least 4-quart capacity) and add the 1/2 cup water, juice or cider.
Cook on high for 3 hours. At the end of that time giving the apples a good stir will make them dissolve into applesauce.
* This recipe is for unsweetened applesauce. If you'd like to sweeten it for kids over one year or yourself, replacing 1/4 cup of the water for 1/4 cup pure maple syrup (a darker grade is best) results in a seriously delicious applesauce free of refined sugar.
* Makes approximately 3 cups.
Showing posts with label baby. Show all posts
Wednesday, January 25, 2012
Staple Recipe: Slow-cooker Applesauce
Wednesday, June 15, 2011
Peachy Keen Creamsicles
It's been a really cool and insanely rainy Spring around here and I couldn't be looking foward more to the arrival of Summer. Because we don't really have the funds to go on a proper vacation this year, we're going to spend the Summer making an effort to explore our own city and surrounding area. While it's natural to be curious about new places, I think its easy to fall into ruts and routines about what's familiar. I'm actually really looking forward to pretending to be a tourist in our own town.
Now that Summer is officially just around the corner (YAY!), it's time to whip up some nice cool treats. Commercial popsicles, creamsicles, and ice pops are full of artificial colors and flavors and since its just so darned easy to make your own, why bother going to the store? This is really a great treat or dessert for the whole family.
These can also be made appropriate for munchkin's under age one and vegans by substituting agave syrup for the honey and using unsweetened rice milk instead of cow's milk.
Peachy Keen Creamsicles
- 1 cup peach slices, fresh or frozen
- 1/4 orange juice
- 2 tbsp honey
- 1 tsp vanilla
- 1/4 cup yogurt
- 1/4 cup milk
Blend all of the ingredients in a blender until very smooth. Divide mixture into 6 ice pop molds (depending on the size of your mold, you may have a little left over -- that's just a little smoothie for the person doing the blending). Freeze overnight.
To unmold, just dip into a cup of warm water for a few seconds to loosen and enjoy!
* makes 6 creamsicles
Now that Summer is officially just around the corner (YAY!), it's time to whip up some nice cool treats. Commercial popsicles, creamsicles, and ice pops are full of artificial colors and flavors and since its just so darned easy to make your own, why bother going to the store? This is really a great treat or dessert for the whole family.
These can also be made appropriate for munchkin's under age one and vegans by substituting agave syrup for the honey and using unsweetened rice milk instead of cow's milk.
Peachy Keen Creamsicles
- 1 cup peach slices, fresh or frozen
- 1/4 orange juice
- 2 tbsp honey
- 1 tsp vanilla
- 1/4 cup yogurt
- 1/4 cup milk
Blend all of the ingredients in a blender until very smooth. Divide mixture into 6 ice pop molds (depending on the size of your mold, you may have a little left over -- that's just a little smoothie for the person doing the blending). Freeze overnight.
To unmold, just dip into a cup of warm water for a few seconds to loosen and enjoy!
* makes 6 creamsicles
Tuesday, May 31, 2011
Blueberry Cinnamon Sauce
An easy and healthy alternative to top you and your child's morning pancakes or waffles!

Blueberry Cinnamon Sauce
- 1 cup frozen blueberries
- 3 tbsp brown sugar
- 1/2 cup water
- 1/4 tsp cinnamon
- 1/4 cup water
- 1 tbsp cornstarch
- 1/2 tsp pure almond extract (optional)
In a small saucepan add frozen blueberries, brown sugar, 1/2 cup water, and cinnamon. Bring contents up to a simmer. As the mixture simmers, mash the blueberries with a potato masher or the back of a spoon to break them up. Simmer for 10-15 minutes.
Mix cornstarch in 1/4 cup water and stir until smooth. Add to blueberry mixture and continue simmering while stirring continuously for about 2 minutes until it has thickened somewhat. Remove from heat and stir in almond extract, if using.
* Makes about 1 cup blueberry sauce.
* Will keep refrigerated for up to one week.
Blueberry Cinnamon Sauce
- 1 cup frozen blueberries
- 3 tbsp brown sugar
- 1/2 cup water
- 1/4 tsp cinnamon
- 1/4 cup water
- 1 tbsp cornstarch
- 1/2 tsp pure almond extract (optional)
In a small saucepan add frozen blueberries, brown sugar, 1/2 cup water, and cinnamon. Bring contents up to a simmer. As the mixture simmers, mash the blueberries with a potato masher or the back of a spoon to break them up. Simmer for 10-15 minutes.
Mix cornstarch in 1/4 cup water and stir until smooth. Add to blueberry mixture and continue simmering while stirring continuously for about 2 minutes until it has thickened somewhat. Remove from heat and stir in almond extract, if using.
* Makes about 1 cup blueberry sauce.
* Will keep refrigerated for up to one week.
Wednesday, May 11, 2011
Herbed Mushroom Sandwich Spread
Happy belated Mother's Day! We went away to visit my parents and spent much of Monday afternoon sitting in a rural hospital waiting room since Luc had a terrible ear infection -- other than that it was a good weekend out of the city! This is the second ear infection in two months so I really hope that he isn't one of those kids that constantly have them...fingers crossed.
Onto more delicious topics, this spread is really yummy. It tastes like concentrated homemade Cream of Mushroom soup. However good it tastes, I could not make this recipe look anything other than gross in a picture and so this is a picture of Luc's lunch that featured this spread. He gets a kick out of eating shapes he knows so anything shaped like a star, heart, ball, or circle goes down well these days. Also delicious served with crackers or crispbreads, both for munchkins and adults. Suitable for babies from 8 months, just cut bread spread with this mixture into a tiny dice once baby shows interest in finger foods.
Herbed Mushroom Sandwich Spread
- 1 1/2 cups sliced white button mushrooms
- 2 shallots, diced
- 1 tbsp butter
- 1 tbsp butter
- 3 tbsp fresh flat-leaf parsley, chopped
- 1/4 cup softened cream cheese
In a large skillet, melt the butter over med-low heat. When bubbling slightly, add the mushrooms and diced shallots and cook, stirring occassionally, until both are softened, about 8 minutes. Stir in chopped parsley.
Let mushroom mixture cool while the cream cheese is softening.
Whiz mushroom mixture with cream cheese in a food processor until fully combined and creamy.
*will keep in the fridge for 1 week
In a large skillet, melt the butter over med-low heat. When bubbling slightly, add the mushrooms and diced shallots and cook, stirring occassionally, until both are softened, about 8 minutes. Stir in chopped parsley.
Let mushroom mixture cool while the cream cheese is softening.
Whiz mushroom mixture with cream cheese in a food processor until fully combined and creamy.
*will keep in the fridge for 1 week
Thursday, May 5, 2011
Avocado and Apple Puree
Avocados, rich in healthy fats, antioxidants, and fibre are a great food to incorporate into your child's diet. Paired with apple, it's an easy sell.This is a quick and deliciously creamy homemade puree suitable for babies from 6 months, once they've had both individually. Also makes a great breakfast alternative for toddlers and older kids...just call it pudding!
Avocado and Apple Puree
- 1/2 ripe avocado
- 1 large sweet apple (I used a Gala)
Peel and coarsely chop the apple. Lightly steam using a steamer insert over a saucepan, or microwave for on high for two minutes in a loosely covered glass container. Let cool slightly.
Scoop out avocado flesh and add along with the apple to the bowl of a food processor. Whiz until smooth, adding water to thin is necessary. (For
* Makes 4 baby servings or 2 toddler servings
* Can be refrigerated for up to 2 days with cling wrap pressed into surface, it will discolor somewhat but it'll still taste fine.
Avocado and Apple Puree
- 1/2 ripe avocado
- 1 large sweet apple (I used a Gala)
Peel and coarsely chop the apple. Lightly steam using a steamer insert over a saucepan, or microwave for on high for two minutes in a loosely covered glass container. Let cool slightly.
Scoop out avocado flesh and add along with the apple to the bowl of a food processor. Whiz until smooth, adding water to thin is necessary. (For
* Makes 4 baby servings or 2 toddler servings
* Can be refrigerated for up to 2 days with cling wrap pressed into surface, it will discolor somewhat but it'll still taste fine.
Friday, April 29, 2011
Baby's Cheesy Pasta
I haven't posted a great deal of recipes for the little munchkins lately (although I have some things in the works), so I thought I would tell you about this super simple homemade baby food recipe that was one of Luc's favorites. It was invaluable to me because I could whip it up with items I always had on hand when life became less than organized. I adapted this recipe from one on Wholesome Baby Food (an absolutely excellent website BTW). This is a great recipe to introduce baby to cheese, starting from 8 months and Luc, who is now almost two, will still gladly eat this little dish.
Baby's Cheesy Pasta
- 1 cup pastina (baby pasta)
- 1 1/2 cups salt-free chicken broth (or vegetable)
- 1/2 cup carrot puree (about 2 Baby Cubes
worth)
- 3 tbsp grated cheddar cheese
Cook pastina in the broth in a medium saucepan according to the length of time on the package. Drain any unabsorbed broth and save for another purpose.
Stir in carrot puree and cheese. Serve to hungry little people.
* Makes 4-5 baby servings
* Can be frozen although better texture if it isn't. Can be kept in the refrigerator for up to 3 days.
Baby's Cheesy Pasta
- 1 cup pastina (baby pasta)
- 1 1/2 cups salt-free chicken broth (or vegetable)
- 1/2 cup carrot puree (about 2 Baby Cubes
- 3 tbsp grated cheddar cheese
Cook pastina in the broth in a medium saucepan according to the length of time on the package. Drain any unabsorbed broth and save for another purpose.
Stir in carrot puree and cheese. Serve to hungry little people.
* Makes 4-5 baby servings
* Can be frozen although better texture if it isn't. Can be kept in the refrigerator for up to 3 days.
Wednesday, April 20, 2011
Book Round-up: Teaching Kids Where Food Comes From
I believe that it's important for kids to make the connection of where food comes from beyond the grocery store. With the increase of the world's population that live in cities, children are losing sight of the fact that actual people grow our food. We have come far from the era where most of us lived on the family farm and the majority of us are exclusively consumers rather than producers of our food. This disconnect is important because food is something that we not only rely on for our health and well-being, but also has significant cultural value and the choices about how that food is produced have major impacts on the environment that our children will grow up in.
Many kids don't know what eggs are, that apples grow on trees, that bacon comes from pigs, that milk comes not from a jug but from a cow, or that vegetables grow in dirt. Thousands of 8 year olds in the UK think that cows lay eggs.
Beyond making the connection with books and with your kids in the kitchen, give your munchkins the opportunity to appreciate hands-on the sights and smells of food production by taking them on a visit to a farmer's market, take a trip to a local farm, go on a family u-pick trip, volunteer together in a community food garden, or start your own veggie patch and get their hands in the dirt. Children are naturally curious to explore and understand the world around them, it's up to us to offer the opportunities to develop a healthy appreciation of real food and where it comes from that will hopefully last a lifetime.
0-2 YEARS
Spot's Harvest
by: Eric Hill
Very cute, simple and bright book in the beloved Spot collection. Spot and his monkey friend pick apples and pumpkins and enjoy their harvest as pie and hot apple cider.

Growing Vegetable Soup: Lap-Sized Board Book
by: Lois Ehlert
Incredibly bright and graphic, this book follows a father and child as they plant, water, tend, and eventually pick vegetables. They take the vegetables home and make them into tasty vegetable soup. Even has a recipe for that soup at the end of the book! Such a good book.
3-5 YEARS
Out and About at the Dairy Farm by: Andy Murphy
Fun and concise introduction to where milk comes from. Introduces children to calves, heifers, and milking cows and is filled with facts to appeal to this age group. It even includes a recipe for homemade ice cream!

Pancakes, Pancakes! by: Eric Carle
In this super cute book, a very determined little boy wakes up hungry one morning and decides that he would like pancakes for breakfast. His mother sends him out on their farm to gather all the ingredients she needs to make them: milk from the cow, eggs from the chicken, and flour from the mill.
4-8 YEARS

Oliver's Fruit Salad by: Vivian French
Oliver helps his grandfather grow and pick fruit from the garden, but he refuses to eat any of it. That is, until Oliver helps grandpa make a big and delicious fruit salad that proves just too much to resist. This bold and colorful book helps encourage kids to try something new.

The Vegetables We Eat
by Gail Gibbons
This book describes all the families of vegetables from how they are grown to how they get to the supermarket or farm stand. Filled with interesting facts as well as information for kids on how to take care of their own garden. A wealth of information presented in a fun kid-friendly format.

The Milk Makers by: Gail Gibbons
Describes every possible step in the making of milk, from what the cow eats all the way to your family's breakfast table. Very detailed and accurate but also still very entertaining and easy to read.
9-12 YEARS
Bread Comes to Life: A Garden of Wheat and a Loaf to Eat
by: George Levenson
This book, written in rhyme covers a lot of ground, following a mystery baker growing wheat, grinding flour, mixing, shaping, and baking bread. Full of fantastic photos and includes a recipe for whole wheat bread. A perfect intro before getting your children to help you make their very own loaf.
For Parents

Kitchen Literacy:How We Lost Knowledge of Where Food Comes From
by: Ann Velesis
Written by a noted historian, this book traces the path that has led people to become disassociated from the origins of their food, from the role manufacturers, to urbanization, to transportation systems. This book is fascinating fun read and a good start, but it doesn't fully delve into what we can do and issues of poverty as much as I would like. However, I would still recommend it for those who are interested in this issue.
Disclaimer: If you click through on these links and purchase these books from Amazon, I will earn a dollar or two -- which goes towards my food budget. However, that has nothing to do with why I have posted this selection of books and by all means, if you are interested in them take them out from your local library or purchase them from your favorite seller.
Many kids don't know what eggs are, that apples grow on trees, that bacon comes from pigs, that milk comes not from a jug but from a cow, or that vegetables grow in dirt. Thousands of 8 year olds in the UK think that cows lay eggs.
Beyond making the connection with books and with your kids in the kitchen, give your munchkins the opportunity to appreciate hands-on the sights and smells of food production by taking them on a visit to a farmer's market, take a trip to a local farm, go on a family u-pick trip, volunteer together in a community food garden, or start your own veggie patch and get their hands in the dirt. Children are naturally curious to explore and understand the world around them, it's up to us to offer the opportunities to develop a healthy appreciation of real food and where it comes from that will hopefully last a lifetime.
0-2 YEARS
Spot's Harvest
Very cute, simple and bright book in the beloved Spot collection. Spot and his monkey friend pick apples and pumpkins and enjoy their harvest as pie and hot apple cider.

Growing Vegetable Soup: Lap-Sized Board Book
Incredibly bright and graphic, this book follows a father and child as they plant, water, tend, and eventually pick vegetables. They take the vegetables home and make them into tasty vegetable soup. Even has a recipe for that soup at the end of the book! Such a good book.
3-5 YEARS
Out and About at the Dairy Farm by: Andy Murphy
Fun and concise introduction to where milk comes from. Introduces children to calves, heifers, and milking cows and is filled with facts to appeal to this age group. It even includes a recipe for homemade ice cream!

Pancakes, Pancakes! by: Eric Carle
In this super cute book, a very determined little boy wakes up hungry one morning and decides that he would like pancakes for breakfast. His mother sends him out on their farm to gather all the ingredients she needs to make them: milk from the cow, eggs from the chicken, and flour from the mill.
4-8 YEARS

Oliver's Fruit Salad by: Vivian French
Oliver helps his grandfather grow and pick fruit from the garden, but he refuses to eat any of it. That is, until Oliver helps grandpa make a big and delicious fruit salad that proves just too much to resist. This bold and colorful book helps encourage kids to try something new.

The Vegetables We Eat
This book describes all the families of vegetables from how they are grown to how they get to the supermarket or farm stand. Filled with interesting facts as well as information for kids on how to take care of their own garden. A wealth of information presented in a fun kid-friendly format.

The Milk Makers by: Gail Gibbons
Describes every possible step in the making of milk, from what the cow eats all the way to your family's breakfast table. Very detailed and accurate but also still very entertaining and easy to read.
9-12 YEARS
Bread Comes to Life: A Garden of Wheat and a Loaf to Eat
This book, written in rhyme covers a lot of ground, following a mystery baker growing wheat, grinding flour, mixing, shaping, and baking bread. Full of fantastic photos and includes a recipe for whole wheat bread. A perfect intro before getting your children to help you make their very own loaf.
For Parents

Kitchen Literacy:How We Lost Knowledge of Where Food Comes From
Written by a noted historian, this book traces the path that has led people to become disassociated from the origins of their food, from the role manufacturers, to urbanization, to transportation systems. This book is fascinating fun read and a good start, but it doesn't fully delve into what we can do and issues of poverty as much as I would like. However, I would still recommend it for those who are interested in this issue.
Disclaimer: If you click through on these links and purchase these books from Amazon, I will earn a dollar or two -- which goes towards my food budget. However, that has nothing to do with why I have posted this selection of books and by all means, if you are interested in them take them out from your local library or purchase them from your favorite seller.
Thursday, April 14, 2011
Staple Recipe: Creamy Crockpot Polenta
Please excuse the fact that there is no picture of this recipe, I forgot to take one, but I was so excited about it that I couldn't wait until I made it again to post about it!
I have always struggled with polenta. I dislike instant polenta's texture and I find the fact that I have to babysit and stir regular polenta for 35-40 minutes tedious in the extreme.
I have now found the perfect solution! Regular polenta cooks up creamy, smooth and amazing in a slow cooker. I've adapted this recipe from one in The Italian Slow Cooker
. Made as posted, this recipe is suitable for toddlers over 1 year but you can make it with all water and serve to babies over 10 months. This is a recipe for basic polenta, but you are really hindered only by your imagination with this one -- I've posted a couple simple variations at the bottom to get you started. Polenta is a great side-dish and is especially good with a meat or mushroom ragu as is, but you can also spread it out on an oiled baking sheet, chill, and cut into diamonds or rectangles and then bake or grill them and use for snacks or as bases for appetizers.
Creamy Crockpot Polenta
- 1 cup coarsely ground corn meal (the old-fashioned kind NOT instant or
quick-cooking)
- 1 tsp salt
- 2 1/2 cup water
- 2 1/2 cups whole milk
Stir all ingredients together in a large slow cooker.
Cook on high covered for 2 hours, stirring once halfway through. At the end or the 2 hours, give it another good stir and check if it needs more liquid -- if so add a little water or milk to thin. Let cook another 30 minutes until thick and creamy. Serve hot.
* Makes 6 adult-sized servings
* Polenta will keep in the fridge for 3 days but is best freshly made.
A COUPLE VARIATIONS:
Add chopped fresh sage along with 1/4 cup grated asiago and 1/4 grated parmesan....YUM
For breakfast: Top with milk, cream, or yogurt, honey or maple syrup, and fresh or dried fruits
Share your favorite variations!
I have always struggled with polenta. I dislike instant polenta's texture and I find the fact that I have to babysit and stir regular polenta for 35-40 minutes tedious in the extreme.
I have now found the perfect solution! Regular polenta cooks up creamy, smooth and amazing in a slow cooker. I've adapted this recipe from one in The Italian Slow Cooker
Creamy Crockpot Polenta
- 1 cup coarsely ground corn meal (the old-fashioned kind NOT instant or
quick-cooking)
- 1 tsp salt
- 2 1/2 cup water
- 2 1/2 cups whole milk
Stir all ingredients together in a large slow cooker.
Cook on high covered for 2 hours, stirring once halfway through. At the end or the 2 hours, give it another good stir and check if it needs more liquid -- if so add a little water or milk to thin. Let cook another 30 minutes until thick and creamy. Serve hot.
* Makes 6 adult-sized servings
* Polenta will keep in the fridge for 3 days but is best freshly made.
A COUPLE VARIATIONS:
Add chopped fresh sage along with 1/4 cup grated asiago and 1/4 grated parmesan....YUM
For breakfast: Top with milk, cream, or yogurt, honey or maple syrup, and fresh or dried fruits
Share your favorite variations!
Labels:
baby,
big kids,
gluten-free,
side dish,
staple recipe,
toddler
Tuesday, April 12, 2011
Whole Wheat Soft Italian Bread Sticks
This is a bread stick recipe that I adapted from one that I found at Food.com (recipe #104628) to make significantly healthier. These are now more nutritious, quicker to make and still flavorful. As I posted before, I LOVE my bread machine
, which incidentally I got for free by redeeming Air Miles! These bread sticks are great for the whole family to round out a supper or as a snack by themselves or with a dipping sauce. We've dipped these both in Luc's Favorite Tomato Sauce as well as Catherine from Weelicious' Ranch Dip with yummy results.These homemade bread sticks are appropriate for children over 8 months.
Whole Wheat Soft Italian Bread Sticks
- 1 1/3 cup water, lukewarm
- 3 tbsp olive oil
- 3 cups whole wheat flour
- 1/2 tbsp gluten*
- 1 tsp Italian seasoning
- 1 tsp garlic powder
- 2 tbsp raw cane sugar (or white sugar)
- 1 1/2 tsp sea salt
- 2 tbsp Parmesan or grana padano, grated
- 2 1/4 tsp instant yeast
Add ingredients to the bread pan of your bread machine in the order listed, making a well in the dry ingredients before adding the yeast.
Select the 'dough' setting.
When the cycle is complete, remove the dough to a lightly floured surface and divide in half. Divide each half into 12 equal pieces. Roll each piece into a 5-6" rope.
Place 2" apart on greased cookie sheets, cover, and let rise in a warm place for 20 minutes until doubled (for this part, I preheat my oven at 200 degrees Fahrenheit for 5 minutes to warm in and let them rise in there).
Bake at 350 degrees Fahrenheit for 12 minutes, turning halfway through, until golden brown.
* Makes 24 bread sticks
* Gluten (aka vital wheat gluten) helps the dough to rise. Can be purchased at health food stores, well-stocked grocery stores, and some bulk stores.
* Freezes well.You can either freeze after baking, or you can freeze the dough after you remove it from the bread machine and upon thawing, just continue with the recipe. I usually freeze half the dough ball to bake later.
Whole Wheat Soft Italian Bread Sticks
- 1 1/3 cup water, lukewarm
- 3 tbsp olive oil
- 3 cups whole wheat flour
- 1/2 tbsp gluten*
- 1 tsp Italian seasoning
- 1 tsp garlic powder
- 2 tbsp raw cane sugar (or white sugar)
- 1 1/2 tsp sea salt
- 2 tbsp Parmesan or grana padano, grated
- 2 1/4 tsp instant yeast
Add ingredients to the bread pan of your bread machine in the order listed, making a well in the dry ingredients before adding the yeast.
Select the 'dough' setting.
When the cycle is complete, remove the dough to a lightly floured surface and divide in half. Divide each half into 12 equal pieces. Roll each piece into a 5-6" rope.
Place 2" apart on greased cookie sheets, cover, and let rise in a warm place for 20 minutes until doubled (for this part, I preheat my oven at 200 degrees Fahrenheit for 5 minutes to warm in and let them rise in there).
Bake at 350 degrees Fahrenheit for 12 minutes, turning halfway through, until golden brown.
* Makes 24 bread sticks
* Gluten (aka vital wheat gluten) helps the dough to rise. Can be purchased at health food stores, well-stocked grocery stores, and some bulk stores.
* Freezes well.You can either freeze after baking, or you can freeze the dough after you remove it from the bread machine and upon thawing, just continue with the recipe. I usually freeze half the dough ball to bake later.
Monday, March 21, 2011
Savory Corn and Cheese Mini Muffins
In my return to work I have realized that it is less tiring being at work than being at home with Luc! Apparently he behaves well at day care and is 'helpful'. I need to find out what their magic is. In the short time it took me to whip these muffins together he managed to eat half a crayon, eat half a dog biscuit, pull the cat's tail, throw a tantrum and defeat the child safety lock on the dining room sideboard....all while I was in the same room and in a span of about 20 minutes.
Oh well...at least the muffins are mighty tasty! I've made them before but made a couple changes this time around and now they are even better. Perfect as a snack, breakfast, or served on the side with soup, these are great at home or in a packed lunch. I adapted this recipe from Top 100 Finger Foods: 100 Recipes for a Healthy, Happy Child
.Suitable for munchkins 10 months and up.
Savory Corn and Cheese Mini Muffins
- 3/4 cup drained canned corn or thawed frozen
- 2 green onions, roughly chopped
- 1/4 plain yogurt
- 1 tbsp maple syrup or honey
- 1 egg
- 2 tbsp butter, melted and cooled slightly
- 1/2 cup all-purpose flour
- 2 tbsp corn meal
- 1/2 tsp baking soda
- 1/2 tsp baking powder
- 1/4 tsp sea salt
- 1/8 tsp paprika
- 1/2 cup grated sharp cheddar
Preheat the oven to 350 degrees Fahrenheit.
Add corn and green onions to a good processor or blender and whiz until chopped. Add yogurt, butter, maple syrup and egg and whiz again to combine.
Mix dry ingredients in a medium bowl. Add yogurt mixture to dry ingredient and stir until just combined. Stir in the grated cheese to the mixture.
Spoon batter into a mini muffin pan, adding about 3/4 tbsp to each cup (the picture shows the muffins with a paper liner, but having tried both, I would suggest just using a greased muffin tin without liners as the muffins stick awfully to the paper).
Bake for 12-15 minutes until risen, golden, and firm to the touch. Cool in the pan.
* Makes 10-12 mini muffins
* These keep well in an airtight bag in the freezer for up to 3 months
Oh well...at least the muffins are mighty tasty! I've made them before but made a couple changes this time around and now they are even better. Perfect as a snack, breakfast, or served on the side with soup, these are great at home or in a packed lunch. I adapted this recipe from Top 100 Finger Foods: 100 Recipes for a Healthy, Happy Child
Savory Corn and Cheese Mini Muffins
- 3/4 cup drained canned corn or thawed frozen
- 2 green onions, roughly chopped
- 1/4 plain yogurt
- 1 tbsp maple syrup or honey
- 1 egg
- 2 tbsp butter, melted and cooled slightly
- 1/2 cup all-purpose flour
- 2 tbsp corn meal
- 1/2 tsp baking soda
- 1/2 tsp baking powder
- 1/4 tsp sea salt
- 1/8 tsp paprika
- 1/2 cup grated sharp cheddar
Preheat the oven to 350 degrees Fahrenheit.
Add corn and green onions to a good processor or blender and whiz until chopped. Add yogurt, butter, maple syrup and egg and whiz again to combine.
Mix dry ingredients in a medium bowl. Add yogurt mixture to dry ingredient and stir until just combined. Stir in the grated cheese to the mixture.
Spoon batter into a mini muffin pan, adding about 3/4 tbsp to each cup (the picture shows the muffins with a paper liner, but having tried both, I would suggest just using a greased muffin tin without liners as the muffins stick awfully to the paper).
Bake for 12-15 minutes until risen, golden, and firm to the touch. Cool in the pan.
* Makes 10-12 mini muffins
* These keep well in an airtight bag in the freezer for up to 3 months
Monday, March 7, 2011
Banana Coconut Overnight Oatmeal
I was belatedly inspired by Tastespotting`s Month of Oatmeal. This oatmeal recipe is based on one of the commenter's recipes and boy, is it ever good! I'm not sure if I could eat oatmeal every day for a month, but this particular oatmeal makes that proposition more appetizing. This particular oatmeal, leaving out the molasses, is perfectly suitable for all munchkins over 8 months.
"You have to eat oatmeal or you'll dry up. Anybody knows that" - Eloise
Would you be able to eat oatmeal every day for a month?
Banana Coconut Overnight Oatmeal
- 1 large banana
- 3/4 cup plain yogurt (maybe homemade!)
- 1 cup rolled oats
- 2 tbsp unsweetened shredded coconut
- 1/4 tsp cinnamon
- molasses, optional, to taste
Mash the banana well with a fork in a bowl large enough to contain all the ingredients. Stir in the yogurt, oats, coconut, and cinnamon until well combined. Cover and store in the refrigerator overnight.
In the morning, give the oatmeal a stir. Heat briefly if desired and top with a drizzle of molasses, if desired.
* Makes one adult serving, or two toddler sized servings
"You have to eat oatmeal or you'll dry up. Anybody knows that" - Eloise
Would you be able to eat oatmeal every day for a month?
Banana Coconut Overnight Oatmeal
- 1 large banana
- 3/4 cup plain yogurt (maybe homemade!)
- 1 cup rolled oats
- 2 tbsp unsweetened shredded coconut
- 1/4 tsp cinnamon
- molasses, optional, to taste
Mash the banana well with a fork in a bowl large enough to contain all the ingredients. Stir in the yogurt, oats, coconut, and cinnamon until well combined. Cover and store in the refrigerator overnight.
In the morning, give the oatmeal a stir. Heat briefly if desired and top with a drizzle of molasses, if desired.
* Makes one adult serving, or two toddler sized servings
Monday, February 28, 2011
Mandarin Vanilla Super Shake
Luc is still sick although seemingly on the mend and hasn't vomited for about 48 hours and his fever has broken. However, understandably he has no appetite and the only thing he would eat was a couple crackers in the last few days. He is uninterested in the usual bland sick foods and all he keeps asking for is milk and fruit.
I didn't want to give him dairy while his tummy was still very sensitive, so I made this shake which is dairy-free but still creamy and a little fruity. It was also delicious! Luc actually wanted to drink it and it stayed in him. We will be making this tasty shake, which is full of protein, iron, whole grains, and vitamin c, whenever we have mandarins on hand!
Mandarin Vanilla Super Shake
- 1 mandarin orange
- 1 half-pack (150 grams) soft tofu
- 1/2 cup ground rolled oats
- 1 tsp vanilla
- 1/2 tbsp ground flax seeds
- 1/4 cup water
- 1 tsp mandarin orange zest
- 1 tbsp agave nectar
Grate the 1 tsp of zest off your mandarin orange, then peel and section. Combine all of the ingredients in a blender or food processor (I used a beaker and immersion blender) and blend until smooth and creamy.
I didn't want to give him dairy while his tummy was still very sensitive, so I made this shake which is dairy-free but still creamy and a little fruity. It was also delicious! Luc actually wanted to drink it and it stayed in him. We will be making this tasty shake, which is full of protein, iron, whole grains, and vitamin c, whenever we have mandarins on hand!
Mandarin Vanilla Super Shake
- 1 mandarin orange
- 1 half-pack (150 grams) soft tofu
- 1/2 cup ground rolled oats
- 1 tsp vanilla
- 1/2 tbsp ground flax seeds
- 1/4 cup water
- 1 tsp mandarin orange zest
- 1 tbsp agave nectar
Grate the 1 tsp of zest off your mandarin orange, then peel and section. Combine all of the ingredients in a blender or food processor (I used a beaker and immersion blender) and blend until smooth and creamy.
Tuesday, February 15, 2011
Gingered Sweet Potato and Carrot Puree
What a crazy busy week this is turning out to be. I even have a job interview tomorrow! Who knows, I might not be a full-time SAHM much longer...I'll let you know how it goes!
Anyhow, this is a great vegetable baby puree that takes plain old sweet potato and carrot up a notch with very little effort. Luc even ate a bowl of it although he generally won't touch anything that's a puree at this stage (unless it's pudding of course!). A nice gentle introduction to some Asian flavors for munchkins 6 months plus.
Gingered Sweet Potato and Carrot Puree
- 1 large sweet potato
- 2 medium carrots
- 4 slices fresh ginger (peeled and sliced into coin sized slices)
- 1/4 tsp ground coriander
Peel the sweet potato and carrots and cut into 1/2 inch chunks. Boil sweet potato, carrots, and ginger slices in a medium saucepan in plenty of water until soft.
Drain, reserving the cooking water. Remove the ginger slices.
Puree, adding the ground coriander and enough reserved cooking liquid to reach baby's favorite consistency.
*Makes about 10 cubes
*Keep up to 3 days in the fridge or freeze up to 3 months
Anyhow, this is a great vegetable baby puree that takes plain old sweet potato and carrot up a notch with very little effort. Luc even ate a bowl of it although he generally won't touch anything that's a puree at this stage (unless it's pudding of course!). A nice gentle introduction to some Asian flavors for munchkins 6 months plus.
Gingered Sweet Potato and Carrot Puree
- 1 large sweet potato
- 2 medium carrots
- 4 slices fresh ginger (peeled and sliced into coin sized slices)
- 1/4 tsp ground coriander
Peel the sweet potato and carrots and cut into 1/2 inch chunks. Boil sweet potato, carrots, and ginger slices in a medium saucepan in plenty of water until soft.
Drain, reserving the cooking water. Remove the ginger slices.
Puree, adding the ground coriander and enough reserved cooking liquid to reach baby's favorite consistency.
*Makes about 10 cubes
*Keep up to 3 days in the fridge or freeze up to 3 months
Monday, February 14, 2011
DIY Baby Wipes
I had been meaning to try making my own baby wipes for ages. Not only are commercial wipes expensive, but they are made from mostly polyester fibers that take at minimum 300 years to biodegrade, and the majority of them contain ingredients that are questionable (i.e. parabens) especially for having around your little one's most delicate bits.
I know that most granola types would promote using reusable cloth wipes. In a perfect world I would use cloth diapers and cloth wipes. However, we have a tiny washing machine and a terrible dryer and I am already completely overwhelmed with laundry, which is often a twice a day event around here. That's my excuse and I'm sticking with it!
Most of the instructions that I came across for homemade baby wipes involve painstakingly removing and then folding sheets from an entire roll of paper towel into a box. Who has the time? Then I happened upon instructions at White House, Black Shutters that literally take 5 minutes to make. But best of all, they work amazing. You do have to use Bounty paper towels just as Ann Marie says...I tried a couple others that were good quality but they were still total fails. While Bounty are expensive, I got mine on sale for $5 off. When I did the cost comparison calculation, I can make 1680 homemade wipes for the cost of 477 commercial ones!
The only changes I made from the original instruction was to make only one container at a time...just to ensure that I would have no issues with mold and to add a couple drops of tea tree oil to the solution to stave off diaper rash.
Check out the full instructions here!
I know that most granola types would promote using reusable cloth wipes. In a perfect world I would use cloth diapers and cloth wipes. However, we have a tiny washing machine and a terrible dryer and I am already completely overwhelmed with laundry, which is often a twice a day event around here. That's my excuse and I'm sticking with it!
Most of the instructions that I came across for homemade baby wipes involve painstakingly removing and then folding sheets from an entire roll of paper towel into a box. Who has the time? Then I happened upon instructions at White House, Black Shutters that literally take 5 minutes to make. But best of all, they work amazing. You do have to use Bounty paper towels just as Ann Marie says...I tried a couple others that were good quality but they were still total fails. While Bounty are expensive, I got mine on sale for $5 off. When I did the cost comparison calculation, I can make 1680 homemade wipes for the cost of 477 commercial ones!
The only changes I made from the original instruction was to make only one container at a time...just to ensure that I would have no issues with mold and to add a couple drops of tea tree oil to the solution to stave off diaper rash.
Check out the full instructions here!
Tuesday, February 8, 2011
Staple Recipe: Homemade Yogurt
Although I've always been meaning to try, for some reason I have always been a little intimidated by making homemade yogurt...I somehow think I'm going to poison us all! When I've looked into making it before, I've encountered so many different methods -- thermos, oven, slow cooker, yogurt maker, etc, etc that I had the impression that it would be time consuming to find what method would work well.
Then I read a recent post on making homemade yogurt over at Dinner with Julie and I finally decided to give it a try using her directions since her method needed nothing more than a pot, a jar and a towel for equipment coupled with minimal effort.
It could not have been easier or turn out better....all on the first try! It was thick, creamy and just plain good and we've been enjoying it all week. I'm so excited about having added this new staple to my home cooking arsenal.
If you've ever toyed with the idea of trying to make yogurt at home, or even if the thought hadn't crossed your mind until now...check out Julie's instructions here...you won't be disappointed!
UPDATE: I have found that to get thicker yogurt, just simmer for 10 minutes rather than the 2 minutes in the instructions.
Is there anything that you're a little intimidated to try to make yourself?
Then I read a recent post on making homemade yogurt over at Dinner with Julie and I finally decided to give it a try using her directions since her method needed nothing more than a pot, a jar and a towel for equipment coupled with minimal effort.
It could not have been easier or turn out better....all on the first try! It was thick, creamy and just plain good and we've been enjoying it all week. I'm so excited about having added this new staple to my home cooking arsenal.
If you've ever toyed with the idea of trying to make yogurt at home, or even if the thought hadn't crossed your mind until now...check out Julie's instructions here...you won't be disappointed!
UPDATE: I have found that to get thicker yogurt, just simmer for 10 minutes rather than the 2 minutes in the instructions.
Is there anything that you're a little intimidated to try to make yourself?
Labels:
adults,
baby,
big kids,
diy,
frugal living,
general cooking,
vegetarian
Thursday, February 3, 2011
Pork and Baked Apple Puree
This is an adaptation of a recipe from The Baby's Table, but made with baked apples instead for a deeper and more palatable flavor. This recipe is suitable for babies from 6 months, as some current recommendations (including Canada's Nutrition for Healthy Term Babies Guide) suggest offering baby iron-rich foods including meat and meat alternatives as first foods. And if you aren't raising your baby vegetarian, meat is a great choice as the iron from meat (heme iron) is more easily absorbed.
Many parents seem to think that their young baby might not like the strong taste of meat. I can only speak from personal experience, but this puree was one of Luc's early favorites and he preferred it when it was made with stronger tasting naturally raised heritage breed pork (Tamworth). So give your munchkins the benefit of the doubt, they might surprise you!
You can still prepare this meal as your child grows older and transitions to finger foods, just serve the pork as cubes and cut the baked apple pieces in halves or thirds and serve on the side with something green.
Pork and Baked Apple Puree
- 1/2 lb stewing pork, cubed
- 1 cup water
- 3 or 4 good baking apples, depending on size (i.e. Golden Delicious, Macintosh, or Cortland)
Preheat the oven to 400 degrees Fahrenheit.
Quarter the apples, and cut out the cores. Spray or lightly oil a baking sheet and place the apple quarters skin side down. Bake for 25-30 minutes, until soft and fragrant.
Meanwhile, put water and pork in a medium saucepan. Bring to a boil over medium heat then lower heat and simmer for 25-30 minutes, until tender.
Remove pork from water and let cool; reserve cooking water. Once both apples and pork have cooled somewhat, puree pork and apples adding the reserved cooking water until puree reaches desired consistency.
Makes approx. 6-7 Baby Cubes
Many parents seem to think that their young baby might not like the strong taste of meat. I can only speak from personal experience, but this puree was one of Luc's early favorites and he preferred it when it was made with stronger tasting naturally raised heritage breed pork (Tamworth). So give your munchkins the benefit of the doubt, they might surprise you!
You can still prepare this meal as your child grows older and transitions to finger foods, just serve the pork as cubes and cut the baked apple pieces in halves or thirds and serve on the side with something green.
Pork and Baked Apple Puree
- 1/2 lb stewing pork, cubed
- 1 cup water
- 3 or 4 good baking apples, depending on size (i.e. Golden Delicious, Macintosh, or Cortland)
Preheat the oven to 400 degrees Fahrenheit.
Quarter the apples, and cut out the cores. Spray or lightly oil a baking sheet and place the apple quarters skin side down. Bake for 25-30 minutes, until soft and fragrant.
Meanwhile, put water and pork in a medium saucepan. Bring to a boil over medium heat then lower heat and simmer for 25-30 minutes, until tender.
Remove pork from water and let cool; reserve cooking water. Once both apples and pork have cooled somewhat, puree pork and apples adding the reserved cooking water until puree reaches desired consistency.
Makes approx. 6-7 Baby Cubes
Tuesday, February 1, 2011
Sorta Portuguese Fish Skillet
We have all been struck by a terrible cold, so I am finally getting around to posting. This is an easy and healthy family meal, that can be enjoyed by any babies over 10 months, just salt adult individual portions instead. For younger babies, you could just take out a few of the potatoes before adding them to the skillet and puree with whatever you have on hand to make them tasty.For this dish, you can use any kind of white fish, I used pollock because that's what I had, but cod wold be more traditional and haddock would also be really good or even tilapia. I apologize for the terrible picture. My husband was anxious to actually eat it rather than look at it.
Sorta Portuguese Fish Skillet
- 2 tbsp butter or olive oil
- 1 1/2 cups diced celery
- 2 medium onions, halved and thinly slice into half-moons
- 1 lb fresh or thawed frozen white fish fillets, cut into bite-sized pieces
- 1/4 sliced pitted black olives
- 1 tsp salt
- 1/4 tsp freshly ground black pepper
- 1/4 cup fresh parsley, chopped
- crumbled feta, to garnish
In a medium saucepan, cook potato slices in boiling salted water until just starting to get tender.
Put the tomatoes and butter (or olive oil) in a large skillet over medium heat and bring to a boil. Break the tomatoes up as they cook with the back of a spoon or a potato masher. Add celery and onions; simmer until the onion have softened, about 5 minutes. Add the fish, salt, pepper, olives and potatoes. Stir to mix everything well. Cover and simmer for 10 minutes, until fish is cooked and flakes with a fork. Stir in the parsley. Serve garnished with crumbled feta cheese to taste.
Makes 4 adult servings
Sorta Portuguese Fish Skillet
- 2 cups canned tomatoes, drained
- 2 cups potatoes, sliced to 1/4" thickness - 2 tbsp butter or olive oil
- 1 1/2 cups diced celery
- 2 medium onions, halved and thinly slice into half-moons
- 1 lb fresh or thawed frozen white fish fillets, cut into bite-sized pieces
- 1/4 sliced pitted black olives
- 1 tsp salt
- 1/4 tsp freshly ground black pepper
- 1/4 cup fresh parsley, chopped
- crumbled feta, to garnish
In a medium saucepan, cook potato slices in boiling salted water until just starting to get tender.
Put the tomatoes and butter (or olive oil) in a large skillet over medium heat and bring to a boil. Break the tomatoes up as they cook with the back of a spoon or a potato masher. Add celery and onions; simmer until the onion have softened, about 5 minutes. Add the fish, salt, pepper, olives and potatoes. Stir to mix everything well. Cover and simmer for 10 minutes, until fish is cooked and flakes with a fork. Stir in the parsley. Serve garnished with crumbled feta cheese to taste.
Makes 4 adult servings
Tuesday, January 18, 2011
My Top 3 Favorite Baby Cookbooks
In my near obsession with baby and toddler cooking, I have read dozens of related cookbooks. While I have found that many of them fall short in that the recipes require more time than as a busy mom I have available, or the recipes simply aren't tasty, I have also come across some gems. I have been asked before which baby cookbooks I would recommend so I am posting my top 3 picks.
1. The Baby's Table: Revised and Updated
- This book contains a lot of great information and many recipes, including many really good ones. Recipes are quick and easy, although a little repetitive and not overly adventurous. Contains handy sample meal plans for different age groups and great charts for reference purposes. Make sure you get the revised version as the previous version has some pretty kooky baby feeding info. My favorite overall. Standout recipes include: Baby Vichyssoise and Maxwell's Minted Lamb.
2. Cooking for Baby: Wholesome, Homemade, Delicious Foods for 6 to 18 Months
- This book features beautiful and inspirational photos and some truly tasty recipes. My only real complaint about the recipes in this book is that there aren't enough of them. Standouts include: Blackberry and Ricotta Parfait, Asparagus "Risotto", and Hidden Veggie Sauce.
3. Easy Gourmet Baby Food: 150 Recipes for Homemade Goodness
-This book was written by a chef and a nutritionist and combines very tasty recipes with sound baby nutritional advice --something that is actually hard to come by among baby cookbooks. Lots of delicious and unusual homemade baby food recipes and recipes for the whole family. I have found that for some recipes, liquid amounts are a bit off and a some recipes are a bit involved. I would still strongly recommend this book to anyone interested in introducing their child to a wide variety of fabulous flavors. Standouts include: Beef Tenderloin and Dates, Millet and Cauliflower with Fresh Oregano, and Warm Pineapple with Cottage Cheese and Basil.
1. The Baby's Table: Revised and Updated
- This book contains a lot of great information and many recipes, including many really good ones. Recipes are quick and easy, although a little repetitive and not overly adventurous. Contains handy sample meal plans for different age groups and great charts for reference purposes. Make sure you get the revised version as the previous version has some pretty kooky baby feeding info. My favorite overall. Standout recipes include: Baby Vichyssoise and Maxwell's Minted Lamb.
2. Cooking for Baby: Wholesome, Homemade, Delicious Foods for 6 to 18 Months- This book features beautiful and inspirational photos and some truly tasty recipes. My only real complaint about the recipes in this book is that there aren't enough of them. Standouts include: Blackberry and Ricotta Parfait, Asparagus "Risotto", and Hidden Veggie Sauce.
3. Easy Gourmet Baby Food: 150 Recipes for Homemade Goodness
-This book was written by a chef and a nutritionist and combines very tasty recipes with sound baby nutritional advice --something that is actually hard to come by among baby cookbooks. Lots of delicious and unusual homemade baby food recipes and recipes for the whole family. I have found that for some recipes, liquid amounts are a bit off and a some recipes are a bit involved. I would still strongly recommend this book to anyone interested in introducing their child to a wide variety of fabulous flavors. Standouts include: Beef Tenderloin and Dates, Millet and Cauliflower with Fresh Oregano, and Warm Pineapple with Cottage Cheese and Basil.
Saturday, January 15, 2011
Baby's Papaya and Raisin Puree
A couple weeks ago I ran into a nearby grocery store to grab a few things quick and I saw a jar of papaya and raisin chutney. It struck me as an unusual combination, so I bought it. It was delicious. I think it stood out to me because I have a tendency to pair tropical fruit with tropical fruit, and temperate fruit with temperate fruit. I guess it makes intuitive sense to me that if they grow together they'll taste good together. This chutney resulted in two things: 1. Teaching me that I have get more adventurous with trying different flavour combinations and 2. This amazing Papaya and Raisin Puree!
This is another homemade baby food recipe that is suitable for babies from 6 months, as long as they've tried papaya on its own. Papayas are a nutrient powerhouse and they also contain something called papain, which aids digestion -- great for baby's tummy. It also helps relieve constipation, which many babies new to solids suffer from.
Papaya and Raisin Puree
1 cup papaya, peeled and chunked
1/4 cup raisins, any variety
Add the raisins to 2 cups of water in a saucepan that has a steamer insert. Leave the insert off for now and bring the water up to a boil over medium heat. Once the water is boiling set on the steamer insert, add the papaya chunks and steam until very tender (ripe papaya is already very soft, this will only take about 2 minutes).
Once done, take off the heat and transfer papaya to a mini-food processor or blender. Let the raisins sit in the hot water until nice and plump, then transfer to the processor with the papaya. Blend until it reaches baby's favourite consistency, adding some of the steaming liquid if necessary.
Makes 3 baby cubes
Keeps for 3 days in the fridge or freeze for up to 3 months
* Would also make a tasty dip for French Toast Strips
* This recipe is easily scaled up, but you will likely have leftover papaya as they are usually large. Papaya freezes really well. Cut the whole thing into chunks, place whatever you don't need right away in single layer on a baking sheet and freeze. Once frozen, transfer to a freezer bag to have on hand for future use.
Variation: Once baby reaches 8 months, swirl in a little full-fat yogurt in this puree.
This is another homemade baby food recipe that is suitable for babies from 6 months, as long as they've tried papaya on its own. Papayas are a nutrient powerhouse and they also contain something called papain, which aids digestion -- great for baby's tummy. It also helps relieve constipation, which many babies new to solids suffer from.
Papaya and Raisin Puree
1 cup papaya, peeled and chunked
1/4 cup raisins, any variety
Add the raisins to 2 cups of water in a saucepan that has a steamer insert. Leave the insert off for now and bring the water up to a boil over medium heat. Once the water is boiling set on the steamer insert, add the papaya chunks and steam until very tender (ripe papaya is already very soft, this will only take about 2 minutes).
Once done, take off the heat and transfer papaya to a mini-food processor or blender. Let the raisins sit in the hot water until nice and plump, then transfer to the processor with the papaya. Blend until it reaches baby's favourite consistency, adding some of the steaming liquid if necessary.
Makes 3 baby cubes
Keeps for 3 days in the fridge or freeze for up to 3 months
* Would also make a tasty dip for French Toast Strips
* This recipe is easily scaled up, but you will likely have leftover papaya as they are usually large. Papaya freezes really well. Cut the whole thing into chunks, place whatever you don't need right away in single layer on a baking sheet and freeze. Once frozen, transfer to a freezer bag to have on hand for future use.
Variation: Once baby reaches 8 months, swirl in a little full-fat yogurt in this puree.
Tuesday, January 11, 2011
Roasted Parsnip and Pear Puree
I realized that I haven't posted many recipes for our youngest munchkins just starting out on solid food, so I thought I would post this puree which is sure to tickle baby's taste buds. Roasting vegetables such as parsnips and sweet potatoes rather than steaming brings out and accentuates their natural sweetness and flavours. As for the idea that you shouldn't introduce baby to sweet tastes first or else they won't accept non-sweet foods, I don't really buy it. If you are breastfeeding, baby is already used to sweet, as breast milk is sweet tasting. Rather, you are just building on the flavors that they know, which will make the transition to solids smoother.
This is fine to make for babies once they have tried each individually to rule out reactions. It is also a great recipe to multitask and make other foods at the same time (try roasting something else in the oven at the same time, and steam two pears rather than one and use half by itself or in another combo to economize on time making baby food).
This is a wonderful combo of seasonal produce and it is so naturally sweet and yummy that you can keep making it as an alternative to applesauce for older babes and kids.
Roasted Parsnip and Pear Puree
- 3 parsnips
- 1 large pear (I prefer bosc for this recipe)
Preheat your oven to 350 degrees Fahrenheit. Peel your parsnips and cut into halves. Place on a baking sheet and bake for 45 min - 1hr, until tender, turning halfway through. (They will start to look a little dry, but don't worry about it).
Meanwhile, peel, core, and chunk the pear. Steam until tender in a steaming basket set over a saucepan of water. Set steamed pear aside, keeping steaming water in the saucepan.
When parsnip is finished roasting, cut into chunks. Bring steaming water back up to a simmer and add parsnip, simmering for 5 or so minutes. This step helps to soften them up and makes creating a nice smooth puree easier.
Puree both parnip and pear in a mini food processor or blender.
Makes 5 or so cubes
* this mixture freezes well
This is fine to make for babies once they have tried each individually to rule out reactions. It is also a great recipe to multitask and make other foods at the same time (try roasting something else in the oven at the same time, and steam two pears rather than one and use half by itself or in another combo to economize on time making baby food).
This is a wonderful combo of seasonal produce and it is so naturally sweet and yummy that you can keep making it as an alternative to applesauce for older babes and kids.
Roasted Parsnip and Pear Puree
- 3 parsnips
- 1 large pear (I prefer bosc for this recipe)
Preheat your oven to 350 degrees Fahrenheit. Peel your parsnips and cut into halves. Place on a baking sheet and bake for 45 min - 1hr, until tender, turning halfway through. (They will start to look a little dry, but don't worry about it).
Meanwhile, peel, core, and chunk the pear. Steam until tender in a steaming basket set over a saucepan of water. Set steamed pear aside, keeping steaming water in the saucepan.
When parsnip is finished roasting, cut into chunks. Bring steaming water back up to a simmer and add parsnip, simmering for 5 or so minutes. This step helps to soften them up and makes creating a nice smooth puree easier.
Puree both parnip and pear in a mini food processor or blender.
Makes 5 or so cubes
* this mixture freezes well
Subscribe to:
Posts (Atom)