Tuesday, February 11, 2014

Savory Cheese and Seed Cookies


Aren't savory cookies just crackers? Well, no, not really. These little guys still  have the texture and appearance of cookies so I think the name is pretty spot on. These cookies are an adaptation of a recipe from Healthy Lunchboxes for Kids. These are a great snack for everyone in our house. I like to eat a couple with a serving of fruit.

Ingredients

- 1 cup grated cheddar
- Scant 1/2 cup butter, softened
- 1 cup whole wheat pastry flour (this flour ground from soft white wheat, rather than hard wheat) or substitute all-purpose flour
- 1 tsp baking powder
- 2 tbsp hulled pumpkin seeds
- 1 tsp baking powder
- 1 cup crispy brown rice breakfast cereal (use white rice cereal if that's what you have)

Directions

1. Preheat oven to 350 degrees F.
2. Line a baking sheet with parchment or a silicone baking mat.
3. Put cheese and butter in a medium mixing bowl and cream together. Add in the flour, baking powder and seeds.
4. Put rice cereal in a plastic zippered bag and break up with a rolling pin. (This is an awesome kid job!) Add to flour mixture and mix everything together, using your hands.
5. Squeeze into small balls the size of cherry tomatoes, roll between your palms, then flatten between your hands. Place on baking sheet and flatten a little more with a fork.
6. Bake 10-14 minutes until golden. Cool on a wire rack. Once fully cool store in an airtight container or freeze.

Makes about 18 cookies

Friday, June 14, 2013

11 Proven Ways to Get Kids to Eat Vegetables

Check out this fantastic post on getting kids to eat vegetables on Summer Tomato!

I have found that all of these tips can be successful.

A couple of other things that I've found helpful is first not ever assuming that a kid won't like something. Offer something as neutrally as you can, even if it's something that you can't stand don't let that colour how you present it! Avoid ever saying something, "oh you won't like that". I overheard this exact comment spoken by a mom recently in the grocery store when a child asked about brussels sprouts.

Something else that I've found useful is giving dishes fun names or naming them after your child's interests. For instance, we eat 'Rugby Soup'. This is really Broccoli and Cauliflower soup, but when we have it, L yells 'Rugby Soup!' and runs over to the table.

Good luck!

Monday, May 6, 2013

New Blog

Check out my new blog all about living better, smarter, and being money-wise at: livingwithinreason.blogspot.com !

Thursday, March 8, 2012

Pumpkin Pie Smoothie

My favorite Pumpkin Pie Smoothie recipe has dissapeared off the blogosphere! So I'm commiting my adaption of it from memory here for safekeeping. There's no picture, but make a mental image of a thick, rich, and  creamy cup of orange-tinged deliciousness that goes down cool but leaves a lingering warm spiciness in your mouth. Hmmm...I think I need to make these for breakfast again tomorrow!                                                                                                

Pumpkin Pie Smoothie- 1/2 banana
- 1/4 cup pumpkin puree
- 1/4 cup plain Greek yogurt
- 1 cup vanilla soy milk
- 1/2 tsp pumpkin pie spice
- pinch cinnamon
- pinch cloves
- agave nectar to taste for sweetness, if needed

Place all ingredients in a blender and blend until uniformly smooth and delicious.

* Makes 2 servings

Tuesday, February 28, 2012

DIY Instant Oatmeal Packets

With both my husband and I rushing to get to work in the morning, the dog to take out and Luc to get ready and off to daycare, mornings can be a little crazy for us just as they can be for most families. While I try to have healthy breakfasts planned and made in advance that doesn't always happen, especially towards the end of the week. These DIY Instant Oatmeal Packets have helped to keep us fed and sane on weekday mornings over the past few weeks. These were inspired by a post on Once A Month Mom but I've made a couple changes to make them a little healthier. Not only are these much less expensive per serving than the pre-packaged commercial varieties but you get to control the sugar content.


The skim milk powder and the sucanat may seem expensive when you buy them, but you can make 200 oatmeal servings using this small bag of milk, and about 145 servings of oatmeal from this bag of sucanat! And of course oats are super inexpensive, especially if you buy them from a bulk store (which clearly I did not do this time!) I also store mine in little reusable containers rather than using up plastic baggies . And while quick oats are not quite as healthy of steel cut oats, they are still considered whole grain (nothing is removed, they're just cut up smaller), so you don't have to feel quilty for succumbing to convenience.


This recipe is for the equivalent of one of those little comercial packets which I find is a good toddler serving size. However, I also make double sized portions as adult-sized servings. You can whip up, assembly line style, a dozen of these in about 3 minutes! You could use brown sugar rather than the succanat but not only is the succanat less refined and healthier, but it really tastes better. This recipe is for a really basic oatmeal but you can experiment with different spices as well as adding dried fruit.

DIY Instant Oatmeal Packet (1 serving)

- 1/4 cup quick oats
- 1 tsp instant milk powder
- 1/2 tbsp succanat
- pinch sea salt
- pinch cinnamon

Mix all into a small resealable container and store in the cupboard for use on those crazy mornings! To use add contents to a small bowl, add 1/2 cup of boiling water, stir and let sit for 2 minutes. Enjoy.

If you have a little more time on your hands here are a couple of my favourite Oatmeal recipes: Chocolate Raspberry Oatmeal and Birchermuesli!

Thursday, February 16, 2012

Pinterest Experiments Part One

I had very good intentions of publishing a cutesy Valentine's Day post featuring some heart shape hard-boiled eggs that I was inspried to try from a Pin. Unfortunately things didn't go exactly as planned and Luc ended up eating a mangled egg as a snack, which was ok for him because lately he just loves hard-boiled eggs and he didn't realize that this time it was actually supposed to be cute.

I've been doing a fair amount of experimenting with ideas that I've found on Pinterest. I know there are  mixed feelings about Pinterest, but I find that not only is it a great way to visually organize my bookmarks, which makes them easier to find again later, and I'm constantly being inspired by other people's amazing creativity and ideas. I'm always looking for new household 'best practices'. Here is a round-up a few of the tricks/ideas/projects that I've recently tried that I found on Pinterest.

1. Heart-Shaped Egg


Verdict: Fail

My egg ended up splitting on the top while at the same time also having indents on the sides where the cardstock dug into the sides of the egg somehow.

I am planning on trying this again, however with thicker card and cutting it down a little lower. How cute would Deviled Eggs be in these?


Verdict: Success!

I was skeptical but this actually worked and they grow so fast that it's incredible. Mine are ready to use again in little more than 1 week.

Just plunk your white root ends in a shot glass and keep on a widowsill and top up the water every couple of days.

Very cool and budget friendly too! Twice the green onions out of one purchase.


Verdict: Fail

I always seem to have leftover green onions that go bad before I can use them, so I was interested to try this method of freezing them.

At first, this method of freezing sliced green onions in an empty water bottle worked great.

However, after the one week, they were starting to get awfully freezer burned already.

The problem lies in not being able to get rid of the air in the container. Probably better to just freeze in a zip-top bag, being sure to squeeze out as much air as possible. You'll have to break off a chunk to use and they wont' look as nice but they'll keep longer.


Verdict: Mixed

I used Dr. Bronner's citrus bar soap as the base for this recipe, but you can use any all-natural bar soap. It was quick and easy to make, super cheap, smelled great, lathered up well and left us all feeling cleaner than with our store-bought body wash.

However, the texture was just awful. It felt like play slime. It was really gross to touch and use.

I'm going to play with the recipe and see if I can get the texture just right, because this could save us quite a bit of money over time instead of buying natural organic paraben-free body washes.

I'll update if I'm successful with this one! 


Are you on Pinterest? What are your favorite Pinterest tips, tricks, and finds?

Wednesday, February 8, 2012

Activity: Food Memory Game

I was originally going to include a photo in this post of L enjoying playing this memory game, HOWEVER he is covered ears to toes in a strep rash and in a couple years he probably won't appreciate having his picture posted on the internet covered in gross red splotches. We took him grocery shopping and a man in the parking lot saw him and made a disgusted face! Even though Ldidn't notice, I still felt like giving him a big cuddle and that guy the dirtiest look I could muster :(  Anyhow, I hope you like this little game I made as much as we did!

How to Prepare

Follow the link below to get started! Just download the images and either print on cardstock or laminate the sheets after printing and then cut apart (I don't have a laminator but I've become a big fan of these self-laminating sheets).

How to Play

This memory game is suitable for young toddlers all the way up to older preschoolers, depending on how you play it. For younger toddlers make this into a simple matching game using only one set of images. Have all the pieces facing upwards, pick out one image and ask the child to find another one just like it. For this age group also use this as a word excercise identifying both the foods pictured and what colors they are.

For older toddlers and preschoolers, start out the memory game by choosing only two sets of cards (4 cards total) and lay them face down. Flip one card face up. Pick a second card and flip it up. See if it matches the first card.  Continue to flip up cards until one matches.  Take the matching pair of cards and put them next to your child. Put the rest of the game cards face down again and repeat the game.  Try to remember the cards you have flipped over. Make sure to keep the cards in the same place in the layout.

To make the game more challenging as your child is ready, take one turn flipping only two cards, so that your child has to remember where the matching card is. You can then add more sets of cards until you are able to use both entire sets.

Also...

You can also use these cards as part of a refrigerator/pantry scavenger hunt to find the corresponding item when the memory game gets boring!


Download the full-sized game cards here

Wednesday, February 1, 2012

Turkey Harvarti Pinwheels with Basil Mayo

I'm back at work this week after being off to help out my incompacitated husband after surgery. He still has an arm in a sling so it's up to me to do most of the chores, looking after Luc, etc. What that means is that I'm really relying on fast and fuss-free food, just like these pinwheels.

Pinwheels make a great part of a lunch. They are super quick and easy to make, more fun presentation-wise than a sandwich, and easier for little hands to manage. Also, now that there are so many more choices of nitrate-free natural deli meat so there are more options for fillings, including this one, which is a favorite around our house. You can substitues chicken for the turkey of course and another kind of cheese if you'd like as well (shaved baby parm sprinkled over top of the meat tastes awesome -- Luc perfers its more mild taste than Parmigiano Reggiano). This below recipe is just for one, but I usually make some for all of us, assembly line-style.


Turkey Havarti Pinwheels with Basil Mayo

- 1 6" whole grain tortilla
- 2 slices nitrate-free turkey deli meat
- 2 slices havarti (or cheese of your choice)
- 1 6" stalk celery, quartered lenthwise to get a skinny stick
- 2 tsp plain cream cheese
- 1 tbsp mayonnaise
- 2 tsp minced fresh basil

In a small bowl or ramekin, mix mayonnaise with fresh basil and set aside.

Lay out your tortilla, and smear the cream cheese over the last inch of the edge on half of the tortilla (the cream cheese will be your glue to hold the whole thing together). Spread the remainder with an even layer of basil mayonnaise. Lay the turkey slices on top, then layer the cheese. Place the celery stick at the lower edge and roll up as tightly as you can, pressing lightly to seal the edge. With a very sharp knife, slice the roll into even slices. Pop the two ugly end pieces in your month to pretend they were never there.


Wednesday, January 25, 2012

Staple Recipe: Slow-cooker Applesauce

I'm writing this post in a hospital waiting room. My husband is finally getting the shoulder surgery he's been wanting to have for several years. His shoulder dislocates fairly regularly and it prevents him from doing many of the activities that he enjoys -- even picking up Luc certain ways. So it's a good hospital visit today, but that doesn't make it any less long!

Applesauce is a baby and toddler staple. From the age of 6 months, you'll be going through a lot of this stuff! The slow cooker makes preparing a big batch of applesauce so easy and convenient. You can then freeze it in whatever quantity works for you. You could use baby cubes for infant-sized portions and one-cup container for toddler, child, and adult portions.

Not only is it a great healthy snack on its own but it makes a great mixer for baby food purees, especially mixed with meats and vegetables that baby may find less appealing on their own. I will be posting a great puree recipe in the coming weeks that features this pre-made applesauce but really so many things taste great with the addition of a bit of sweet apple. It also great to have on hand in the freezer to bake with or to use as a dip for waffle strips.                                                


Slow-cooker Applesauce


- 3lbs  Macintosh apples
- 1 tsp apple cider vinegar
-  2 quarts (8 cups) water
- 1/2 cup water, apple juice, or cider

In a very large bowl mix the 2 quarts of water with the apple cider vinegar.

Peel, core and quarter the apples, placing them in the bowl of water as you go, making sure they get submerged (this step prevents browning).

Once you are done cutting the apples, drain them well and add them to a slow-cooker (at least 4-quart capacity) and add the 1/2 cup water, juice or cider.

Cook on high for 3 hours. At the end of that time giving the apples a good stir will make them dissolve into applesauce.

* This recipe is for unsweetened applesauce. If you'd like to sweeten it for kids over one year or yourself, replacing 1/4 cup of the water for 1/4 cup pure maple syrup (a darker grade is best) results in a seriously delicious applesauce free of refined sugar.

* Makes approximately 3 cups.


Tuesday, January 17, 2012

The Things They Say

I'm home with Luc because he's sick today (oh, the petri dish that is daycare...) and for lunch I made him a tuna  salad sandwich and I put a couple sweet gherkin pickles on the side. He's had them before but it's been quite some time and when I called him over for lunch he looked at them and said, "Ewww, doggy's poop!". He then proceeded to make grunting sounds and said "I no eat poop" and threw them on the floor. No explaining that they were pickles and edible would make him believe it!


Lunchbox Labels

Luc has a cousin today! He is very cute and has the most adorable chubby cheeks. It's just too bad that he was born halfway around the world in Australia so we only get to look at photos of the little guy instead of getting to meet him in person. :( I'm happy for my sister-in-law and her husband on their new family but it's also sad that we live so far away from one another that our children will never really get to know each other. Skype and email are wonderful,  but they don't really make up for visits only being possible once every few years. Oh well, we'll do the best we can to keep our families connected!

When Luc started daycare, everything was so last minute since I only had two weeks (!) to find a daycare and get everything ready before I started my new job. I ordered some Name Bubbles to label his clothing (which have been absolutely fantastic because they stay put in the wash but are removable is you want to sell your kids' clothes or use them for your next child). Somehow, while I was ordering however I completely forgot to order labels to put his name on lunch containers.

First I tried writing his name in permanent marker. That turned out decidedly ... non-permanent. I tried using a regular label maker to make printed labels. It was easy and they looked great but they just really didn't stand up to the dishwasher and I didn't want to be always stuck hand-washing everything. I then tried using my old-school embossing label-maker like this one, and it worked great! The two Lock and Lock food containers below were labeled about 5 months ago and have been used virtually every day and they still are perfectly legible.

So while, the personalized Name Bubbles are really cute, this not only saved me $20 but I can use the label-maker for other projects. Yay for multipurpose! Also, I rather like the retro look of them anyhow.

Tuesday, January 10, 2012

Indian-Inspired Chicken Soup

This soup is just a little more work that most of the recipes that I post here, but as long as you have an immersion blender (and you should, they're awesome! I have this one and I love it) then it's really not a big deal.

This recipe came about by taking my favorite parts of several real Indian soup recipes and combining them. The result is that this "franken-soup" is no longer very authentic (hence, 'Indian-Inspired) but it's really very tasty and wonderfully warming for fall and winter.

Keeping the chicken in quite large chunks to start makes it easier to remove the chicken when it's time to puree the soup. Then you can quickly chop the cooked chicken and add it back into the soup as more manageably sized pieces. This recipe is suitable for munchkins over 10 months.


Indian-Inspired Chicken Soup

- 1 cup uncooked chicken breast,  large dice
- 1/4 cup onion, chopped
- 1/4 cup celery, finely chopped
- 1/4 cup carrot, finely chopped
- 2 tart apples (or if sweet, omit sugar), pared and chunked
- 1/4 cup butter or ghee
- 1/4 cup all-purpose flour
- 1 tsp curry powder (preferably Madras)
- 6 cups low sodium or homemade chicken broth
- 1 tomato, peeled and chopped
- 1/2 med green pepper, finely chopped
- 1 tbsp flat leaf parsley, minced
- 1 tsp salt
- 1 tsp granulated sugar
- 1/8 tsp ground black pepper
- 1/8 tsp ground mace (or substitute a pinch of ground nutmeg)
- 2 whole cloves
- 1 cup cooked Basmati rice

Cook chicken, onion, celery, carrots, and apple in melted butter un a large saucepan over medium heat until softened and fragrant.

Stir in flour and curry powder and cook 1 minute. Gradually add chicken broth, stirring constantly. Stir in all remaining ingredients. Cook, covered, over low heat until chicken is tender, roughly 20 minutes.

Remove and reserve chicken with a slotted spoon. Fish out and discard the cloves.

Using an immersion blender, puree the soup until it is smooth (Alternatively you can work in batches in your blender or food processor). Give the chicken a rough chop to make the pieces bite-sized. Stir in cooked rice.

Enjoy!

* Serves 4-6


Tuesday, January 3, 2012

10 Favorite Recipes of 2011

This is a list of the Munch recipes from 2011 that I find myself coming back to again and again. The one thing that they all have in common is that they are drop dead easy to make and always welcome at the table or in the lunchbox.

What was your favorite Munch recipe of 2011?

1. Chocolate Raspberry Oatmeal
2. 50/50 Bread
3. Chocolate Tofu Pudding
4. Blueberry Banana Mini-Muffins
5. Senegalese Peanut and Tomato Soup
6. Whole Poached Chicken
7. Luc's Favourite Tomato Sauce
8. Baked Coconut Shrimp
9. Curried Chicken and Cheese Balls
10. Honeyed Blueberry Yogurt

New Year, New Posts

I have decided to resurrect this blog! I'm not sure if any of my readers are still out there, but I'm very excited about reconnecting with you and anyone new stumbling onto here! I won't be posting as frequently as I used to, but at the very least I will have a new post up here every Tuesday.

I  hope everyone had a wonderful holiday season and is looking forward to a Happy New Year!

Monday, August 15, 2011

Luc is 2!

Actually he turned two on the 6th, but we've been out of town since then without...gasp...internet access! I can't believe how big my little boy is getting. He seemed to lose his 'babyness' overnight, and what he can do and how well he can communicate now just amazes me compared to only a month ago. 


Yesterday he told me that there where "birds flying in the air" complete with flapping arms. This was his longest sentence yet and contained two words he's never said before! 


Luc had a small but very happy birthday party at home with people close to him and managed to get completely spoiled. For the party, I made these really yummy-- but not even a little bit healthy-- cupcakes. I went classic with Dark Chocolate Cupcakes with Vanilla Buttercream Icing. I used my favorite chocolate cake recipe which I highly recommend as it's not only super quick and easy, it'll stay super moist for 3 days covered at room temperature . Also, they must've been good because Luc learned the word 'cake' solely from seeing and eating these on his party day. 


So when you're feeling indulgent, you can find the recipe here. To make it into cupcakes simple cut the cooking time to around 12 minutes, keeping an eye on them and checking with a toothpick until it comes out clean. 


I always make my own icing because not only does it take about 5 minutes but I find that the canned ones taste like plastic. I love this cake recipe iced with a Chocolate and Espresso Icing but that's not exactly kid-friendly, so I tried a Vanilla Buttercream Icing that turned out wonderfully. Next time I make these, I'm going to try subbing out the vanilla for peppermint extract and make Dark Chocolate Cupcakes with Mint Buttercream Icing...YUM!

Wednesday, August 3, 2011

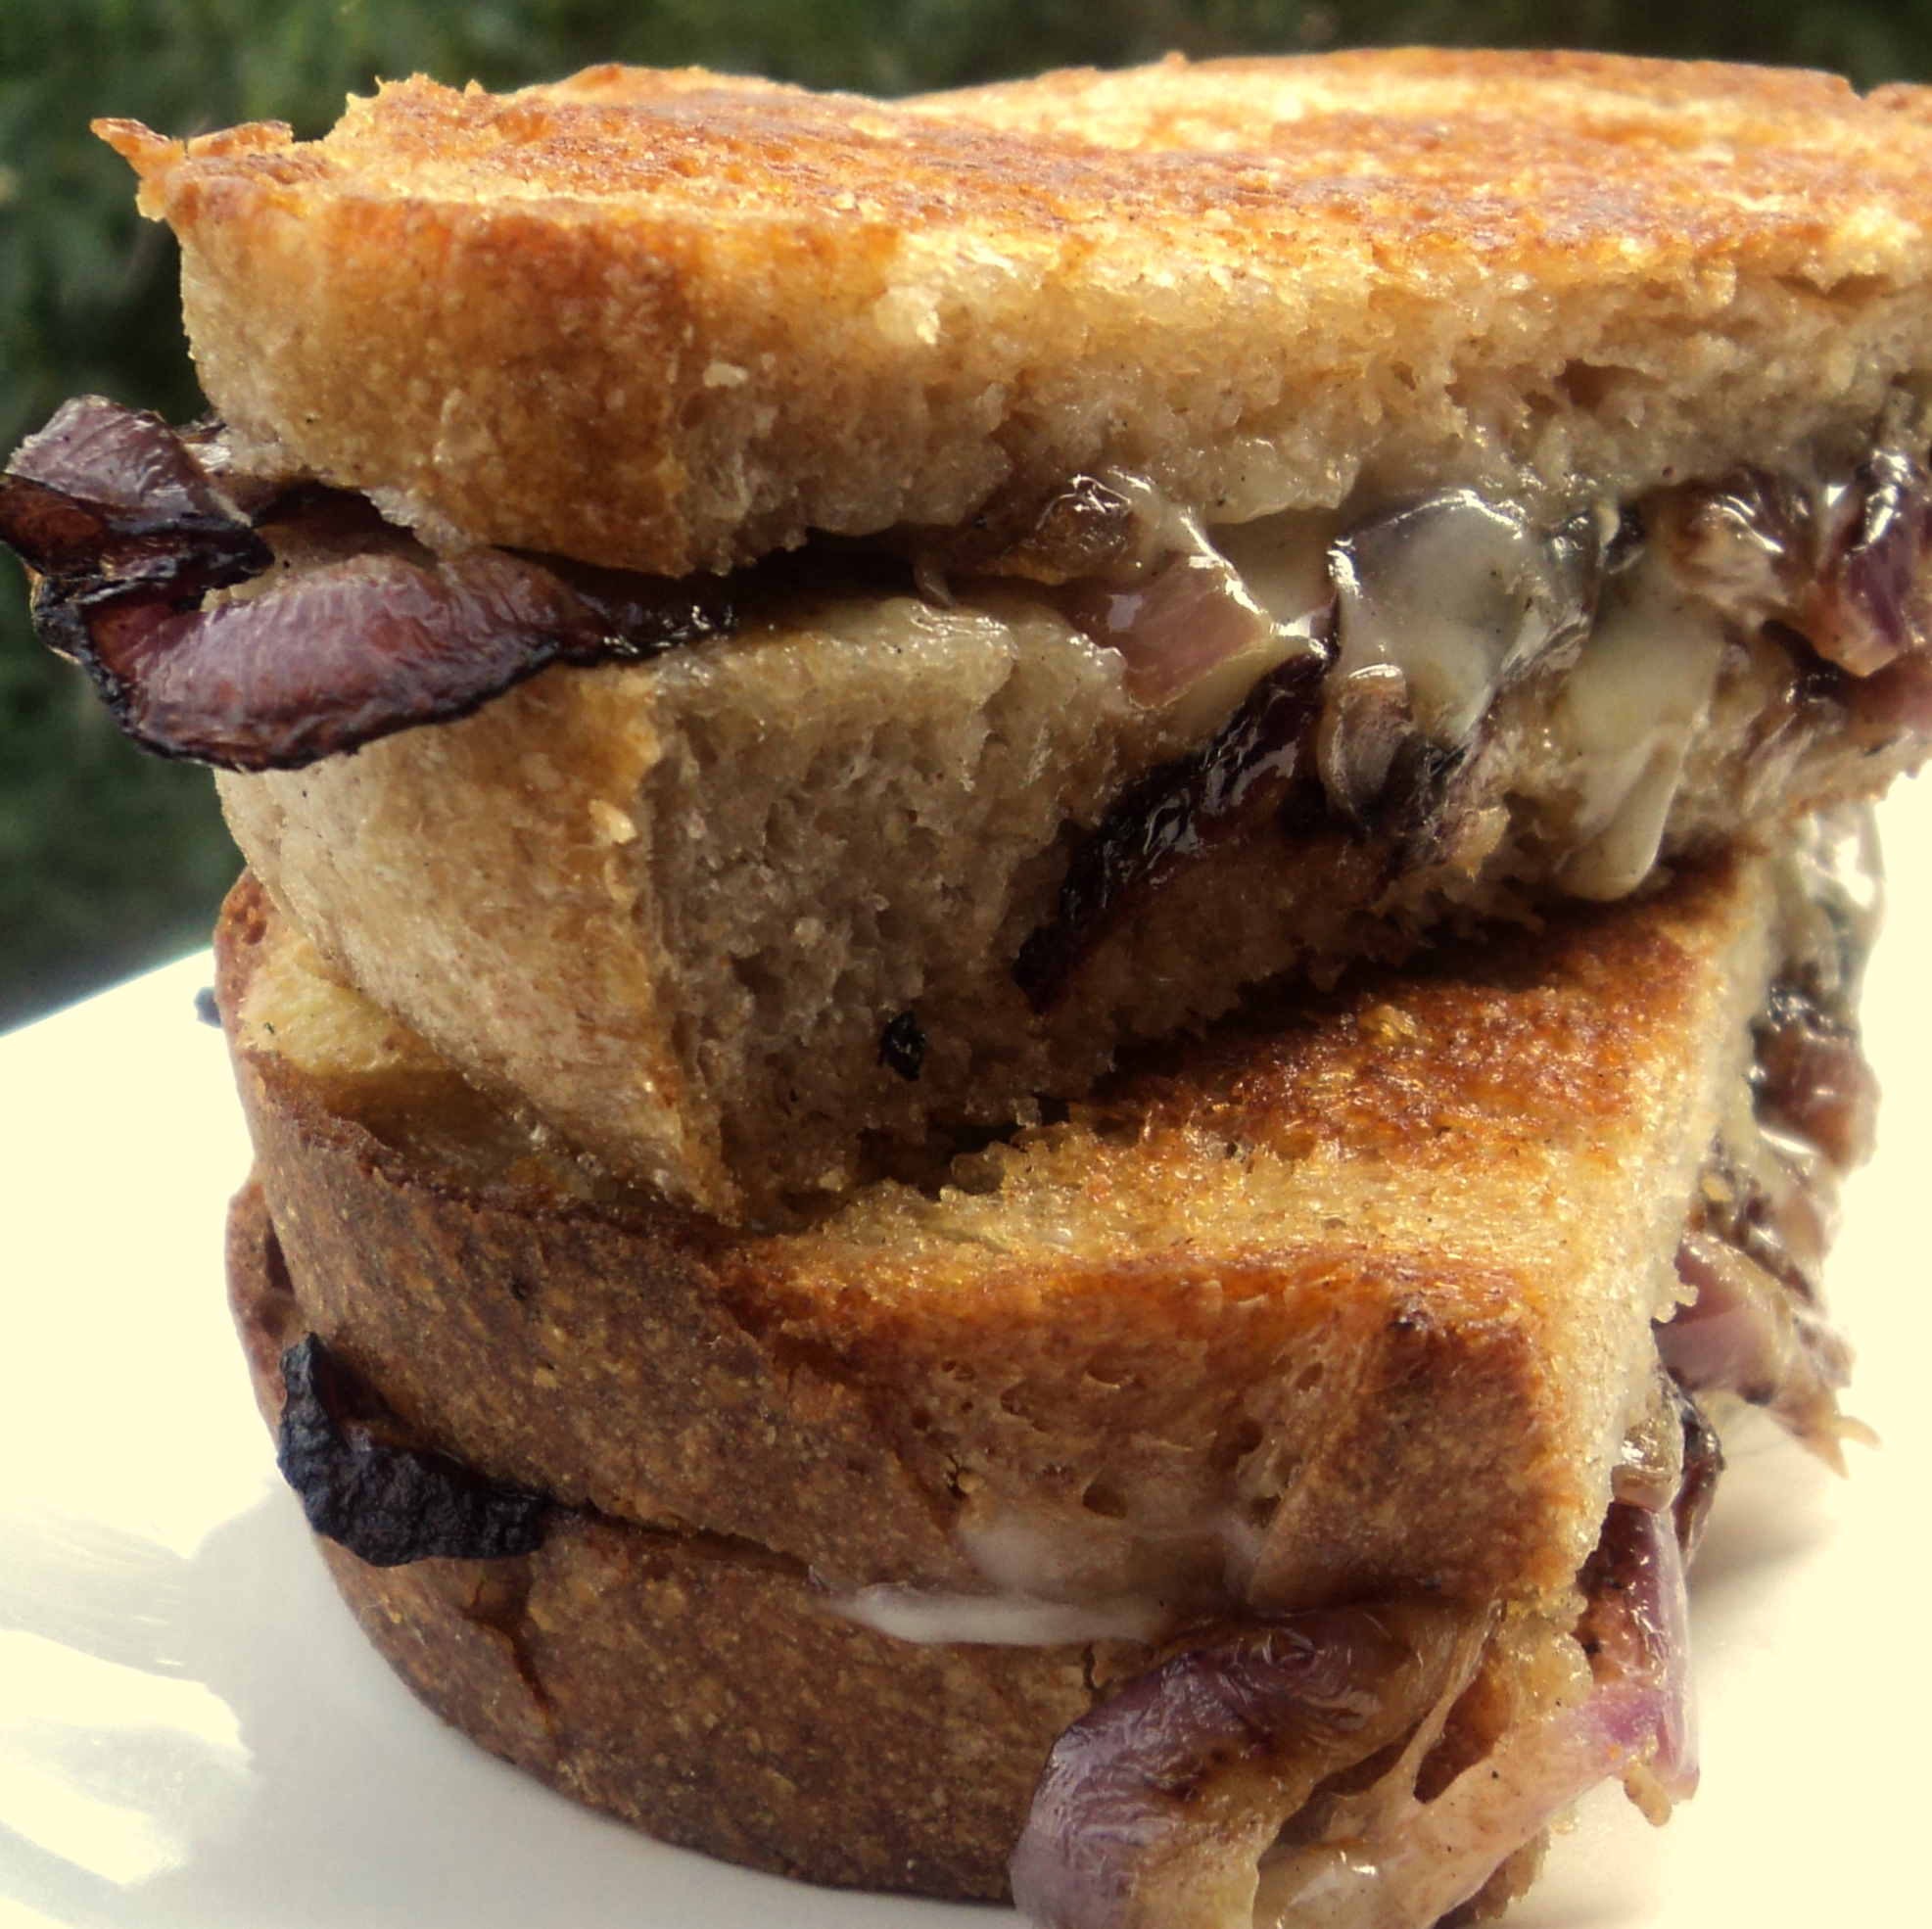
Recipe Shout-Out: Amazing Grilled Cheese

This Grilled Cheese with White Cheddar, Carmelized Onions and Sage recipe from Gaby over at Broke-ass Gourmet is super easy and insanely delicious.  Luc and I both inhaled them. It's just not the same without  white sourdough bread so don't be tempted to sub in something healthier -- sometimes it's just not worth the compromise. Next time you have a craving for some goey cheesy goodness make this super flavorful sandwich, you will not be dissapointed!


Tuesday, July 19, 2011

Honey-Curry Dip

It's no secret that kids (and most adults!) like food better that they are able to dip into a tasty sauce. This is a super quick, tangy and slightly sweet dip that works beautifullly with veggies or homemade chicken nuggets for anyone over the age of one. Practically guaranteed to singlehandedly increase vegetable consumption!

Honey-Curry Dip

1/4 cup plain Greek yogurt (you can use regular but it'll be thin)
1/4 cup mayonnaise (or Veganaise)
1/4 tsp curry powder
1/2 tsp white vinegar
1/2 tbsp honey

Gently whisk all ingredients in a small bowl. Enjoy!


* makes 1/2 cup
* will keep covered tightly in the refrigerator for 4-5 days.

Friday, July 15, 2011

Seeds Banned!

It's been so long since I've posted, anyone reading might have thought something horrible had happened to my hands that I couldn't cook or type. So...that isn't what happened. What has happened is a combination of lack of inspiration, busy schedules, failed cooking experiments, and one small boy with an enormous amount of energy!

My son's daycare has just informed us that we can no longer pack any seeds or seed butters in his lunches and snacks! While on the one hand I want to be respectful of children with allergies, on the other hand it's a huge pain in the ass! Nuts and seeds are so healthy and I do try to encorporate them regularly in Luc's diet. Since he started daycare, as I've posted previously on here, I've subbed Sunbutter for nut butters so that I can continue making some of his favorite snacks. Well...I guess I need work on developing a bigger repertoire of seed and nut free/ easily packed/easily eaten independently by toddlers snacks....sigh...

Monday, June 27, 2011

Strawberries in Ginger Cream

I work Saturdays, a fact that would be a major downer except that where I work just happens to also be the site of one of the best farmer's markets in the city that day. 


Last Saturday, I didn't mean to buy anything, we had our CSA box coming and we didn't really need anything, but I just couldn't help myself when I was walking through and caught the strongest whiff of strawberries imaginable that stopped me dead in my tracks. Most supermarket frankenberries shipped from California look beautiful but have almost no smell, even with your nose pressed right up on them. These fresh local strawberries by contrast smelled of sweet fields still kissed by the sun. They were irresistible and I bought two pints.

After eating them straight up, this recipe is my second favorite way to enjoy strawberries. Due to the strawberries and honey, this tasty little number is suitable for babies over age 1. 


Strawberries in Ginger Cream

- 1 cup sliced strawberries
- 2/3 cup plain yogurt
- 1 tbsp good quality honey
- 1-2 tbsp very finely chopped crystallized ginger


Mix all of the above ingredients in a medium bowl. Divide into individual serving bowls and enjoy!


Serves 4.

Wednesday, June 22, 2011

Where Food Comes From: Visiting the Urban Farm

If you've been following this blog, you have probably already noticed from this post's book round-up that I feel strongly about importance of kids making the connection between farm and fork. This is knowledge that has become increasingly lost as we become more urbanized. In 2008, humanity passed an important milestone that for the first time ever, globally more people now live in cities than not.

Although we should make the effort to get our kids outside of the city once in a while, many cities have urban farms of various types, from historic showcases to real working farms (even our family's CSA produce comes from within our city's limits!), to help give children a sense of where food comes from. The photos below are from our weekend visit to Riverdale Farm, a 7.5 acre slice of downtown Toronto that is a representation of a historic Ontario farm complete with cows, goats, horses, a donkey, chickens, turkeys, pigs, geese, ducks, and rabbits -- but it was the tractor that was Luc's favorite part!
Below are a few samples of other urban farms that you can visit with your family, and with a little reseach I'm sure you could find near you!

Riverdale Farm  Toronto, Canada
Maplewood Farm Vancouver, Canada
Vauxhall City Farm London, UK
Phillipsburg Manor New York, USA


The Girls


It is Luc's opinion that nothing runs like a Deere


Pastoral perfect in downtown Toronto
Related Posts Plugin for WordPress, Blogger...