Friday, January 28, 2011

Carrot and Fruit Bread Fingers

I adapted this recipe from the Organic Baby & Toddler Cookbook that I reviewed here to make it both healthier and more successful. The result is a really tasty quick breakfast or snack that's perfect for toddlers over age one or to tuck in a lunch box for school-aged munchkins (or to snack on yourself). 


Carrot and Fruit Bread Fingers

- 1/4 cup butter, softened
- 1/3 cup honey
- 1 egg, beaten
- 3/4 cup carrots, grated
- 2 bananas, mashed
- 1 1/4 cup whole wheat flour
- 2 tsp baking powder
- 1/2 cup raisins, dried currants, or dried cranberries
- 1/4 tsp salt
- 1 tsp grated orange zest

Preheat oven to 350 degrees Fahrenheit. 

Cream the butter and honey together in a large mixing bowl. Beat in the egg. Mix in the carrots, bananas, flour, and baking powder. Add dried fruit and zest. 

Turn the mixture into an 8" square cake pan and level the surface with the back of your spoon. Bake until a toothpick comes out clean when you still it in the middle and the top is golden brown, bout 30 minutes. 

Let cool in the pan. Cut into bars and serve or keep for up to 4 days in an airtight container (not in the fridge). 

Makes 12 bars

Thursday, January 27, 2011

Cheesy Leftover Pasta Frittata

I accidentally cooked too much pasta for a dish a couple days ago and had some leftover that I didn't want to go to waste. This frittata was a simple and tasty way to use it up and while you could have it for breakfast or brunch, it also makes a great lunch with a salad on the side. The possibilities for variations with this one are virtually endless, making it a great way to clean out the fridge!


Cheesy Leftover Pasta Frittata

- 1/2 cup onion, chopped
- 1 tbsp olive oil
- 1 tbsp butter
- 6 eggs
- 1/4 cup milk
- 1/2 cup frozen peas
- 1/3 cup Parmesan cheese, grated
- 1 tbsp fresh basil, minced
- salt and pepper, to taste
- 1 cup cheddar cheese, grated
- 1 cup cooked pasta (any kind, but if long like spaghetti, cut into 1" pieces)

Preheat the broiler. In a heavy, oven-proof skillet, melt the butter and oil over medium heat. Add the onion and cook until it starts to soften, about 3 minutes. Meanwhile, in a large bowl, beat the eggs. Add the milk, basil, Parmesan, and season with salt and pepper. Stir the pasta and peas into the egg mixture.


Add the egg mixture to the skillet with the onion, gently pushing the pasta around until it is evenly distributed. Cook over medium-low heat until the egg is almost set. Remove from the heat and sprinkle the top evenly with the cheddar. 


Transfer the pan to the oven under the broiler, about 4-5" from the heat and cook for 5-8 minutes until the fritatta is set and is slightly golden brown.


Remove from oven, cut into wedges and serve. 


* this recipe is suitable for babies over age one, due to egg whites.
* this recipe is best eaten right away.


VARIATION: Substitute chopped green pepper for half of the onion, and Swiss for half of the cheddar.

Wednesday, January 26, 2011

Keeping Baby Busy While You Cook

Keeping a munchkin who is too young to help out in the kitchen happily occupied is always a challenge...especially with some kids who may be a little less than patient. Luc has a really short attention span...which probably has a lot to do with my emphasis on quick and easy recipes. I'd love to get a  Learning Tower
since I've heard such great things about them, but with a small kitchen, we just don't have the space.

Anyhow, Ohdeedoh just had a great post about strategies to help. Check it out here.

What do you do to keep your baby or toddler occupied while you're cooking?

Tuesday, January 25, 2011

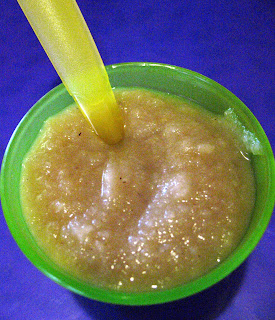
Roasted Banana Puree

As easy as it is to just peel and mash a banana to give to baby, why not introduce your little munchkin to the wonderfully concentrated banana-ness of roasted banana?  As you may have noticed from my post on Roasted Parsnip and Pear Puree, I'm a big fan of roasting fruits and veg to heighten their flavors. This puree is appropriate as a first food for those 6 months and up.


Roasted Banana Puree

- 1 banana, unpeeled
- breast milk or formula for thinning, if needed

Preheat oven to 350 degrees Fahrenheit. Once heated, pop in the banana in its peel on a baking sheet and roast for 25 minutes. 

Let cool. Slice open the peel and mash the banana in a bowl, adding breast milk or formula to thin if needed. 

Makes 1-2 baby servings (depending on the size of your banana)

*easily scaled up, just roast more bananas at a time.
*freezes well for up to 3 months. 

Variation: Roasted Banana and Papaya Puree - add roasted banana to steamed papaya chunks and puree together.

Monday, January 24, 2011

Birchermuesli

Birchermuesli, which is a Swiss breakfast with raw oatmeal and fruit, has to be one of my favorites. I used to work beside a place that had it for takeout in the mornings, and I used to buy it several times a week. What a waste of money when it's so easy to make at home. This is a super healthy meal or snack--in fact it was originally devised by a Swiss Doctor as part of his recommended wellness regime. The possibilities for variations are endless. My favorite is basic like this but you can always add dried fruits, nuts, substitute pear for the apple or add spices like cinnamon and nutmeg. Enjoy! (Because of honey, this is suitable for anyone over age 1, you could make it using another sweetener, but it won't taste quite like Birchermuesli).


Birchermuesli

- 1 cup rolled oats
- 1 cup water
- 1 apple, skin on, grated or minced
- 2/3 cup blueberries, fresh or thawed frozen
- 1/2 cup plain yogurt
- 3 tbsp honey, or to taste

Mix the oats with the water and allow to sit for at least 12 hours in the refrigerator (please note that you can't skip this step). 

Just before serving, add apple, bluberries, yogurt, and honey. Mix well and serve. 


* makes 3 adult-sized servings


* can be refrigerated after mixing but it's best if it's eaten the same day (I sometimes will eat the leftovers as a before bed snack).

Friday, January 21, 2011

Activities from the Recycle Bin: Crayon Holders

Ok, so this isn't really an activity in and of itself, but it does help the kiddos in going about their activities in an orderly way and it makes it easy for them to help clean up after themselves. I found this Montessori-Style crayon holder made from fruit cups(!) at Mom's Crafty Space and I loved it so much that I thought I would share it here. Click here to see how she did it.

Thursday, January 20, 2011

Maple Syrup Roasted Chickpeas

I wasn't sure about posting this recipe, as to my adult taste buds, these are missing something and I was going to work a little more on this recipe. However, Luc decided that they are a hit and ate an astonishing amount of them, which since he hasn't been too interested in food lately, is a definite seal of approval. And tasting them again...maybe he's right. Sometimes keeping things straightforward is best, especially with toddlers going through a picky phase.


Maple Syrup Roasted Chickpeas

-1 can chickpeas
-1 tbsp melted coconut oil (expeller pressed, not virgin), or canola oil
-3 tbsp maple syrup (dark, Grade B is best as it's more flavorful)
-1 tsp cinnamon

Preheat oven to 350 degrees Fahrenheit. Drain, rinse, and pat the chickpeas dry. 
 
Mix oil, syrup and cinnamon in a bowl and toss with the chickpeas. Line a baking sheet with foil and spread the chickpeas in one layer. Bake for 30 minutes, stirring every 10 minutes and making sure they don't burn.

Tuesday, January 18, 2011

My Top 3 Favorite Baby Cookbooks

In my near obsession with baby and toddler cooking, I have read dozens of related cookbooks. While I have found that many of them fall short in that the recipes require more time than as a busy mom I have available, or the recipes simply aren't tasty, I have also come across some gems. I have been asked before which baby cookbooks I would recommend so I am posting my top 3 picks. 


1. The Baby's Table: Revised and Updated

- This book contains a lot of great information and many recipes, including many really good ones. Recipes are quick and easy, although a little repetitive and not overly adventurous. Contains handy sample meal plans for different age groups and great charts for reference purposes. Make sure you get the revised version as the previous version has some pretty kooky baby feeding info. My favorite overall. Standout recipes include: Baby Vichyssoise and Maxwell's Minted Lamb.


 2. Cooking for Baby: Wholesome, Homemade, Delicious Foods for 6 to 18 Months

- This book features beautiful and inspirational photos and some truly tasty recipes. My only real complaint about the recipes in this book is that there aren't enough of them. Standouts include: Blackberry and Ricotta Parfait, Asparagus "Risotto", and Hidden Veggie Sauce. 


 3. Easy Gourmet Baby Food: 150 Recipes for Homemade Goodness 

-This book was written by a chef and a nutritionist and combines very tasty recipes with sound baby nutritional advice --something that is actually hard to come by among baby cookbooks. Lots of delicious and unusual homemade baby food recipes and recipes for the whole family. I have found that for some recipes, liquid amounts are a bit off and a some recipes are a bit involved. I would still strongly recommend this book to anyone interested in introducing their child to a wide variety of fabulous flavors. Standouts include: Beef Tenderloin and Dates, Millet and Cauliflower with Fresh Oregano, and Warm Pineapple with Cottage Cheese and Basil.

Monday, January 17, 2011

Baked Coconut Shrimp

A baked version of a fried favorite. Great for toddlers, to put beside an icepack in a lunchbox, or as an adult appetizer. These are dead easy, nutritious and delicious. I've included a recipe for a dipping sauce that I made at the same time to go with them as well as a pic of Luc's lunch today featuring this shrimp (cut up). It was a HUGE hit with lots of "mmmmm" sounds coming from the direction of the high chair. I made the amount for two toddler servings...but I ate the rest of them....


Baked Coconut Shrimp

-10 large shrimp, peeled and deveined (tails off if it's easier for your toddler)
-1/4 cup unsweetened finely shredded coconut
-2/3 cup panko bread crumbs
-pepper, to taste
-salt, to taste (optional)
-1 egg white

 Preheat the oven to 450 degrees Fahrenheit. Line a baking sheet with aluminum foil and smear lightly with olive oil or spray with cooking spray. 

 Season shrimp with salt and pepper, if using. In a bag, combine coconut and panko (alternatively, place on a pie plate). In a small bowl, beat egg white until it gets a little frothy. 

Dip shrimp in egg white, letting the excess fall back into the bowl and place in the bag. Shake until well coated with panko and coconut (I did five at a time, which worked well). Once shrimp are well coated, shake off excess and place on baking sheet. 

Bake in preheated oven 4-5 minutes per side, turning once. 

Makes 2 toddler servings.

Marmalade Dipping Sauce

-1 tbsp marmalade
-1/2 tsp honey
-1/4 tsp prepared mustard
-1/4 tsp water

Mix all ingredients in a small bowl, microwave 15 seconds on high, and mix again until well combined. Serve with Baked Coconut Shrimp. 

Saturday, January 15, 2011

Baby's Papaya and Raisin Puree

A couple weeks ago I ran into a nearby grocery store to grab a few things quick and I saw a jar of papaya and raisin chutney. It struck me as an unusual combination, so I bought it. It was delicious. I think it stood out to me because I have a tendency to pair tropical fruit with tropical fruit, and temperate fruit with temperate fruit. I guess it makes intuitive sense to me that if they grow together they'll taste good together. This chutney resulted in two things: 1. Teaching me that I have get more adventurous with trying different flavour combinations and 2. This amazing Papaya and Raisin Puree! 

This is another homemade baby food recipe that is suitable for babies from 6 months, as long as they've tried papaya on its own. Papayas are a nutrient powerhouse and they also contain something called papain, which aids digestion -- great for baby's tummy. It also helps relieve constipation, which many babies new to solids suffer from. 


Papaya and Raisin Puree 

1 cup papaya, peeled and chunked
1/4 cup raisins, any variety


Add the raisins to 2 cups of water in a saucepan that has a steamer insert. Leave the insert off for now and bring the water up to a boil over medium heat. Once the water is boiling set on the steamer insert, add the papaya chunks and steam until very tender (ripe papaya is already very soft, this will only take about 2 minutes). 


Once done, take off the heat and transfer papaya to a mini-food processor or blender. Let the raisins sit in the hot water until nice and plump, then transfer to the processor with the papaya. Blend until it reaches baby's favourite consistency, adding some of the steaming liquid if necessary.

Makes 3 baby cubes 


Keeps for 3 days in the fridge or freeze for up to 3 months


* Would also make a tasty dip for French Toast Strips


* This recipe is easily scaled up, but you will likely have leftover papaya as they are usually large. Papaya freezes really well. Cut the whole thing into chunks, place whatever you don't need right away in single layer on a baking sheet and freeze. Once frozen, transfer to a freezer bag to have on hand for future use. 


 Variation: Once baby reaches 8 months, swirl in a little full-fat yogurt in this puree.

Friday, January 14, 2011

Fledgling Foodie Activity: Fruit Activity Cards

Luc would eat fruit all day if we let him and lately he's been really interested in learning the names for different fruits. I came up with these Fruit Activity Cards to play into that interest. They cost literally nothing to make and could be used in so many ways. We did a simple matching game of finding fruit from bowl and putting it with the picture, but you could also add a tasting component, make a game of grouping them together to match what your child is having for lunch, etc, etc. Since these were successful, I'm planning to make more fruits as well as vegetable cards and perhaps ones for other foods. 


To make these cards you will need:

- a cardboard box
- some plain white printer paper
- clear packing tape
- colouring materials (I used Luc's crayons since they were handy)
- scissors

I printed the outlines out on the computer using clip art and then cut them out, but if you can draw you could just draw them. I found most of the clip art here, and just did a Google image search for the others. I sized them to all the same size in Word and then printed them. You could add the names of the fruits to the cards if you wanted to make the activity cards into a pre-reading exercise as well.

Colour in your fruit images and then cut them out. Cut out pieces of the cardboard box to match the size of your fruit cutouts. Line up the two pieces and cover the whole card with clear packing tape.

Now you and your munchkin are ready to play!

Wednesday, January 12, 2011

New Recipe List Page!

I've just added a new Recipe List page that lists all the recipes found on Munch by course (I will also add a listing by age in the next few days). Hopefully, this will help make it easier for anyone interested to find what they are looking for. Any other suggestions on how to make this blog better are always appreciated!

Mediterranean Scrambled Eggs

I'm almost embarrassed to post this "recipe", as it's so simple. It's the result of being really late and needing something to feed the little one ASAP. It isn't the most photogenic dish on the planet, but you can get it on the highchair tray in 3 minutes flat and my little guy at least, vacuumed it up. Because this contains egg whites, it is only suitable for babes over one year.


Mediterranean Scrambled Eggs

- 2 large eggs
- 1 tsp prepared pesto
- 3 tbsp finely diced tomato
- 3 tbsp grated parmesan cheese
- splash of milk

Lightly oil a small nonstick skillet (I just use a little canola oil on a paper towel). Turn heat on medium-low. 

Whisk all the ingredients a a bowl until a little frothy. Pour into hot pan and cook until done, stirring it a couple of times. 


Makes 1 toddler serving

Perfect Scrambled Eggs on FoodistaPerfect Scrambled Eggs

Tuesday, January 11, 2011

Roasted Parsnip and Pear Puree

I realized that I haven't posted many recipes for our youngest munchkins just starting out on solid food, so I thought I would post this puree which is sure to tickle baby's taste buds. Roasting vegetables such as parsnips and sweet potatoes rather than steaming brings out and accentuates their natural sweetness and flavours. As for the idea that you shouldn't introduce baby to sweet tastes first or else they won't accept non-sweet foods, I don't really buy it. If you are breastfeeding, baby is already used to sweet, as breast milk is sweet tasting. Rather, you are just building on the flavors that they know, which will make the transition to solids smoother. 

This is fine to make for babies once they have tried each individually to rule out reactions. It is also a great recipe to multitask and make other foods at the same time (try roasting something else in the oven at the same time, and steam two pears rather than one and use half by itself or in another combo to economize on time making baby food).

This is a wonderful combo of seasonal produce and it is so naturally sweet and yummy that you can keep making it as an alternative to applesauce for older babes and kids.


Roasted Parsnip and Pear Puree

- 3 parsnips
- 1 large pear (I prefer bosc for this recipe)


Preheat your oven to 350 degrees Fahrenheit. Peel your parsnips and cut into halves. Place on a baking sheet and bake for 45 min - 1hr, until tender, turning halfway through. (They will start to look a little dry, but don't worry about it). 


Meanwhile, peel, core, and chunk the pear. Steam until tender in a steaming basket set over a saucepan of water. Set steamed pear aside, keeping steaming water in the saucepan. 


When parsnip is finished roasting, cut into chunks. Bring steaming water back up to a simmer and add parsnip, simmering for 5 or so minutes. This step helps to soften them up and makes creating a nice smooth puree easier.


Puree both parnip and pear in a mini food processor or blender. 


Makes 5 or so cubes


* this mixture freezes well

Monday, January 10, 2011

Hearty Lamb and Vegetable Stew

Outside my window it's a winter wonderland, which is a bit of a rarity for Toronto (we don't get all that much snow). And while I'm not a big fan of cold weather, it is stunningly beautiful. This kind of weather is perfect for peasant-style comfort food that warms you from the inside out, so I made this hearty winter stew. It takes a long time, but most of that time it's just simmering on the stove-top, leaving you free to do other things. This stew is suitable for babies over 10 months, just puree to the consistency baby can handle after it's cooked, but truly this is a great meal for the whole family, although older members might like a wee bit of salt!


Hearty Lamb and Vegetable Stew 

-1/2 pound stewing lamb, trimmed of excess fat and cut into 1/2" cubes
-1 large carrot, chopped
-2 large potatoes, cubed
-1 small onion, chopped
-2 cloves garlic, minced
-1 bay leaf
-1/2 tbsp fresh rosemary, chopped
-1 tbsp all-purpose flour
-couple grindings black pepper (optional)
-1 tbsp olive oil
-3 tbsp tomato sauce (or 1 tbsp tomato paste)
-2 cups salt-free beef broth or water

 Toss the cubed lamb with the flour in a bowl. Heat 1 tbsp olive oil over medium-high heat in a medium saucepan. Once hot, tip in the lamb and brown, seasoning with freshly ground black pepper, if desired. 

Once the lamb is nicely browned, add the vegetables, bay leaf, rosemary, garlic garlic. Turn heat down to medium and cook until onion softens, about 5 minutes. Scrap up the browned bits from the bottom of the saucepan with a spoon and add broth and tomato sauce. 

Bring to a boil, then lower heat and simmer 1 1/2 hours or more until everything is softened and flavours are well combined. 


Would be great served with Munch Whole Grain Broccoli Biscuits


Variations: Add 1/2 cup of frozen peas with the broth and tomato sauce. You could also substitute beef for the lamb.

Sunday, January 9, 2011

Honeyed Blueberry Yogurt

This isn't much of a recipe, just something that I used to eat as a snack a lot when I was pregnant and that Luc now likes. It makes for a healthy and tasty snack, breakfast, or dessert. You can use either fresh or frozen blueberries for this concoction. I used frozen today, which is why the whole thing is so purple. Because of the honey and the nuts, this recipe is only suitable for babies over one year. If you worry that the berries might pose a choking hazard for your little one, if you are using frozen berries, they are easy to mash into the yogurt with a fork once they thaw.


Honeyed Blueberry Yogurt 

- 1/3 cup vanilla yogurt (or use plain and add a dash of vanilla extract)
- 1/4 cup blueberries, fresh or frozen
- honey, to taste (you will need a little more with frozen as they tend to be    
 more sour)
- small palmful chopped almonds (if you have a little extra time, toasting the almonds makes it extra  yummy)

Mix yogurt, blueberries, and honey well in a bowl. Sprinkled with almonds. Enjoy! 

Will keep in the refrigerator a couple days minus the almonds (as long as it hasn't been eaten from as saliva breaks down the yogurt).

Variation: Substitute apricot preserves for some or all of the honey. 

Friday, January 7, 2011

Activities from the Recycle Bin: Plunker

I thought I would test out the idea of posting baby, toddler, and kids activities once a week and see if people would be interested in these posts. These activities would either be food related, made with items that you would find in the kitchen heading to the recycle bin, or be activity-based recipes. The idea is that they will be quick and simple things that you don't have to be an experienced crafter to pull off. I will post a few over the next couple of weeks; please let me know what you think!


This is an idea I got from the book Things to Do with Toddlers and Twos. This activity takes advantage of the compulsion of toddlers to put things into holes. You will need an empty clean coffee can or similar. Just cut an X into the lid and you have a Plunker.


Now just find a variety of items from around your home that your toddler can drop in to make a satisfying sound, making sure obviously that they are too large to be choking hazards. Look for a variety of materials (wood, plastic, rubber, metal, etc) so that they all make different noises as they hit the bottom of the can.


And that's it! Super simple, but appealing to ones and twos and when they tire of it, you can just put the can back into the recycling. Luc also enjoyed working on his fine motor skills by practicing taking the lid on and off.

Thursday, January 6, 2011

Apple Cinnamon Quinoa Breakfast

I've been getting lazy with trying new things for breakfasts lately and Luc definitely seems as though he's getting bored with the same old repertoire. I had made him a quinoa dish with apple for breakfast before and he liked it but it was quite labour intensive and frankly, lately I don't have the time. This is a adaptation of a recipe from Smart Breakfasts by Jane Kinderlehrer and it's quick, tasty, and healthy -- my three favourite cooking adjectives! You can make this for babies over 8 months by peeling the apple and pureeing the whole thing, adding breast milk or formula to thin if necessary.


Apple Cinnamon Quinoa Breakfast

- 1 cup quinoa, rinsed well and drained (or buy pre-rinsed to make it really quick to throw together)
- 2 cups water
- 1 apple, unpeeled and finely chopped
- 1/4 cup raisins
- 1/2 tsp ground cinnamon


In a medium saucepan, add the quinoa and the water and bring to a boil. Cover and cook for 5 minutes. Add apple, raisins, and cinnamon and simmer about 10 minutes, until all the water is absorbed. 


5  toddler servings
Variation: chopped pear and cardamom

Tuesday, January 4, 2011

Product Praise: The Antilop

Instead of posting a recipe today, I thought that I would post about one of my favourite products...the Antilop highchair from IKEA. 

Luc had  a more traditional padded high chair originally, but there was an unpleasant incident where he vomited all down himself and the chair and the floor and although we washed the cover immediately and scrubbed the chair we could not get the smell out. I washed the cover four times and it still reeked and the smell had seeped into the straps. So to the landfill it went unfortunately. That weekend I was heading to a big kids consignment sale and I picked up a used Antilop for all of $8 with the tray to use until we decided which new chair to buy.


We all liked it so much that we now would not dream of getting any other. Luc has always had a hatred of being restrained, and the Antilop only has a waist strap rather than a five-point harness so he is much happier in it and is more interested in eating rather than fighting to get out. The best part though is that it`s so easy to clean. No cover to wash, no crevices for food to get caught in and you can just wipe the whole thing down. It`s also easy to take apart and store or travel with if you need to.

While I have mixed feeling about the Swedish mega-retailer, I have been very pleased with the quality of design and construction of several of their children`s products.

What are some of your favourite IKEA kids products?

Sunday, January 2, 2011

Pumpkin Oatmeal Pancakes

I was looking for a new pumpkin pancake recipe to use up some leftover pumpkin puree and I came across a tasty looking recipe for Pumpkin Oatmeal Pancakes at Tiny Morsels that looked like they would be just the ticket. Luc turned his nose up at my last attempt and upon trying them, I couldn't blame him! I made these ones last night and he absolutely hoovered them and I agree, they were yummy. I used regular milk in place of dairy-free (if you used rice milk you could give them to babies under 1) and I also have run out of whole wheat pastry flour so I used half white and half regular whole wheat. Other than that I followed the recipe exactly. Check them out here.

Lemony Millet Pilaf

We were supposed to have Spanish-style quinoa with supper tonight, however, when I went to grab the quinoa I discovered that there were only a few tablespoons of it left and our last red pepper was fit for the compost. I came up with this millet side dish instead and not only was it easy peasy, but it turned out really well. It's quite lemony, but not overly so and the flavour of the vegetables really comes through. Over the past year, we have been trying to incorporate a wider variety of whole grains into our diets, but have struggled to find a good side dish recipe for millet. Well, we have one now! This dish is suitable for all members of the family over age 1, but you could make it work for younger babies by squeezing lemon juice over the dish after removing a baby-sized portion and omitting the salt.


Lemony Millet Pilaf 

 - 2 tsp olive oil (or use some of the oil from the sun-dried tomatoes for more flavour)
- 1 small onion, finely chopped
- 2 stalks celery, finely chopped
- 1 clove garlic, minced
- 3/4 cup millet
- 1 1/2 cups low-sodium chicken or vegetable broth
- juice of 1/2 lemon
- 1/4 cup sun-dried tomatoes, well drained and finely chopped 
- 1/2 tsp sea salt
- freshly ground black pepper, to taste
- 1/4 cup chopped fresh italian (flat-leaf) parsley


In a medium saucepan heat the olive oil over medium heat and add the onion, celery, and garlic, salt and pepper. Cook until vegetables softened and fragrant, about 8 minutes. Add the millet; stir well to coat the grains in oil and cook about 1 minute more. Add broth, lemon juice, and sun-dried tomatoes. Bring to a simmer, cover, and reduce heat to low. Let cook for 20-25 minutes until all the liquid is absorbed, adding a little extra water or broth if it looks as though it is getting too dry. Remove from the heat and let sit 10 minutes until grains are tender. Fluff with a fork and serve. 


Makes 4 side-dish servings